
Mock Starbucks Pumpkin Spice Frappuccino Blended Coffee Recipe (low carb, no sugar)
Place all ingredients into blender in the order listed, except for whipped cream and sugar-free caramel topping. Blend well until no chunks of ice remain. Taste and add additional sweetener, pumpkin, and/or salt to your taste preference. Top with whipped cream, if desired. Drizzle with sugar-free caramel topping, if desired. Quick and easy enough that you can whip this up in a jiffy and satisfy your cravings for such a wonderful pumpkin spice frappuccino, whether you are on the Atkins diet, Trim Healthy Mama, or Paleo! Posts from Joy In Our Journey.com that you might also enjoy:
Thanks so much for coming by to visit! The Lord is so good to us!
This post was originally published on http://www.JoyInOurJourney.com. If you see this posted elsewhere, it has been illegally scraped, and I'd love it if you would let me know. Thanks!
1 Comment
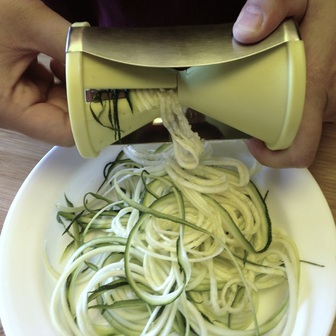
I don't know about you, but I'm a pasta lover - all the way. Me and pasta are best friends. (Okay, you grammar Nazis - don't correct me!) Well, all right. Pasta and I are best friends. Is that better? ☺ The problem is, I really shouldn't eat pasta, not since I began eating a low-carb eating plan (Trim Healthy Mama). And one of my daughters cannot eat gluten, so that makes pasta almost out of the question for her. Sure, there are other gluten-free alternatives, but they definitely are not insulin-friendly or for those who are trying to lose weight. Even my favorite Dreamfields Pasta? Well, their company has changed their tune, and it is no longer being promoted as a low-glycemic pasta. Rats. After learning about the changes with Dreamfields Pasta and realizing my daughter needed to eat gluten-free, I began to look into other options. Someone on Facebook mentioned spiral slicers, and that piqued my interest. Well, when I start researching something, I learn all kinds of things! ☺ I've learned that there are several types of spiral slicers, whose purpose is to slice vegetables into pasta strands for those who cannot eat pasta or are looking for healthier options. There are the cone spiral slicers, like the Brieftons Spiral Slicer, below - and I get to give one away this week! Click on the Rafflecopter entry form below, or if you are reading this in your email, please click over to the post to enter or click on the link below that says "a Rafflecopter giveaway.” You'll also commonly find what I call the "tabletop" style and the "covered pot" style of veggie spiral slicers. Each type has their advantages and disadvantages.
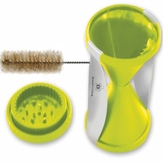
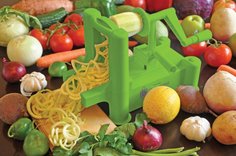
I've personally used two types of spiral slicers so far: the Brieftons "cone" Spiral Slicer, and another brand's "covered pot" style of spiral slicer. Since I'm giving away one of Brieftons' "cone" type of spiral slicer, I'm mainly going to let you know how well this product works. The Brieftons Spiral Slicer is inexpensive (under $13) and easy to use. It is small and takes up very little room in a kitchen drawer or cupboard. Nice! The Brieftons Spiral Slicer, like other cone-style spiral slicers, is used much like a pencil sharpener, where the veggie is the "pencil", and the slicer is the "sharpener". After washing off your veggies or fruits such as carrots, potatoes, turnips, rutabagas, zucchinis, cucumbers, large radishes, apples, squash, pears, etc., peel off the skin if necessary or desired. Straight and firm vegetables and fruits work best with this type of spiral slicer. Use one hand to hold the spiral slicer's stainless steel handles. Use the other hand to carefully insert your veggie into the spiral slicer's "cone", making sure that the vegetable stays straight in the middle of the cone. Twist it in with moderate pressure to create long strands of the vegetable or fruit. When the size of the vegetable or fruit becomes shorter, use the provided "end cap" to attach to the end of the vegetable. This will help you to process the whole vegetable - or most of it. Oh, and the Brieftons Spiral Slicer has two different julienne sizes on it: 1/16" x 3/32" (2 x 3 mm) and 1/8" x 3/16" (3.5 x 5 mm). These sizes aren't marked on the cones themselves, but by glancing at the spacing between the blades on each side, it's evident which side is which. If you're more of a visual learner, you may watch the video, below, on how to use the Brieftons Spiral Slicer: For best results when using the Brieftons Spiral Slicer:
Note: If you are left handed, you can still use the Brieftons Spiral Slicer the following way:
This video, below, demonstrates how to clean the cone-types of spiral slicers:
|


 | Let's give away one brand new Brieftons Spiral Slicer! Entrants must be 18 years or older; only U.S. residents are eligible to enter this giveaway. |
 | |
This post was originally published on http://www.JoyInOurJourney.com. If you see this posted elsewhere, it has been illegally scraped, and I'd love it if you would let me know. Thanks!
I received one or more of the products mentioned above for free using Tomoson.com. Regardless, I only recommend products or services I use personally and believe will be good for my readers.
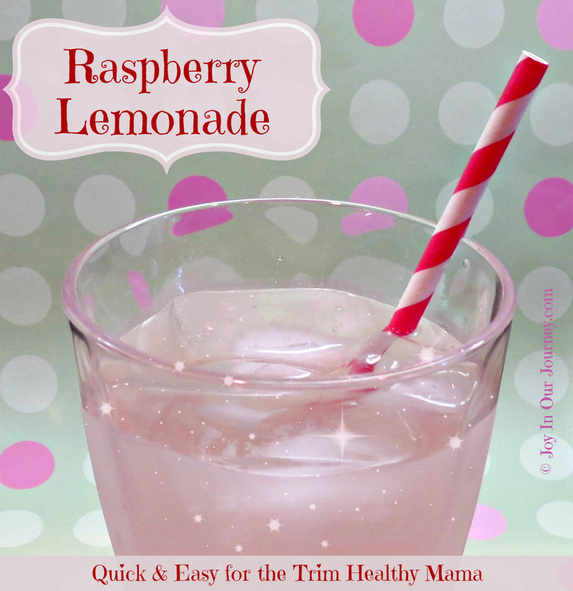
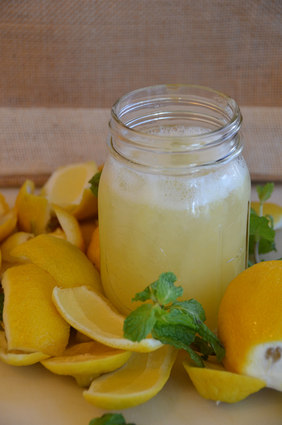
Read below to see how I make quick, sparkling Raspberry Lemonade!
I don't know about where you live, but our summer here in Oregon has been extraordinarily hot.
I remember in my childhood when the unofficial state pet was the banana slug. ☺ Ha!
This summer, we've had weeks upon weeks of 90° + days! There are very few slugs to be found. Whew!
Making homemade raspberry lemonade is a wonderful treat on a hot day, but what's a Trim Healthy Mama to do if she wants a quick, cold beverage? If you are diabetic, pre-diabetic, gluten free, paleo, low carb, or trying to break your soda addiction, this is the beverage for you!
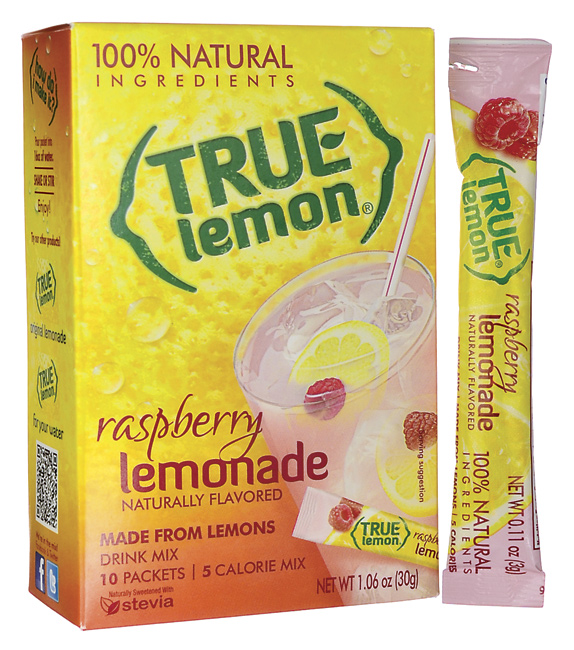
I've discovered True Lemon's new Raspberry Lemonade drink mix this summer. Guess what? It's not only "on plan" for Trim Healthy Mama, it takes about 5 seconds to mix up! Definitely a Drive-Thru Sue type of beverage, if you've read Trim Healthy Mama. ☺
What about True Lemon's Raspberry Lemonade Nutrition and Ingredients?
 | 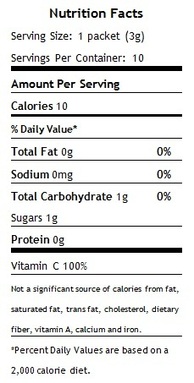 |
You can see that each packet of drink mix, which easily makes 2+ cups of Raspberry Lemonade, only contains 10 calories, no sodium, no fat, and only 1 gram of carbs. Woot!
Here is the list of ingredients:
- no artificial sweeteners
- Fresh-squeezed lemon taste with a burst of raspberry flavor
- Just 10 calories per 2-cup glass
- Preservative-free, sodium-free, and gluten-free
- Sweetened with a blend of Stevia and a very light touch of sugar
Here is the list of ingredients:
- crystallized lemon: citric acid, lemon oil, lemon juice, Vitamin C
- sugar (very tiny amount)
- natural raspberry flavor
- Stevia Leaf Extract
- Beet Juice and Turmeric (for color)
True Lemon's Raspberry Lemonade is so quick and easy to make. Just pour one drink packet into 16 oz. (two cups) of cold water.
But...if you love sparkling, bubbly beverages on a hot day, here's what I do!
But...if you love sparkling, bubbly beverages on a hot day, here's what I do!
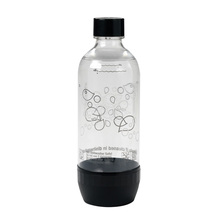 | I fill my SodaStream bottle up to the line near the top with cold water. I twist the bottle of water up into the SodaStream, push the button on top until it makes three "buzzes", and now I have carbonated water. ☺ If you don't own a SodaStream, you can buy club soda and chill it in the refrigerator until needed. |
Sparkling Raspberry Lemonade Recipe!
If you are going to use carbonated water for your Raspberry Lemonade, here's a caution:
***Pour the drink mix powder into a tall glass first! Then, pour 1/4 to 1/2 cup of carbonated water into the glass; stir gently until powder has disappeared. Slowly add more carbonated water until you've added around two cups altogether. Stir, add ice, and enjoy!
And yes, I learned the hard way to add the drink powder first when using carbonated water. Ha! We're talking Raspberry Lemonade all over my kitchen counter, shooting up toward the ceiling, and all over me!
Wow. Lesson learned. ☺
There are some new flavors that True Lemon is also making:
- Peach Lemonade
- Original Lemonade
- True Lime Black Cherry Limeade
- True Orange Mango Orange
- True Orange-ade
 | Want to make Raspberry Lemonade |
 | |
This post was originally published on http://www.JoyInOurJourney.com. If you see this posted elsewhere, it has been illegally scraped, and I'd love it if you would let me know. Thanks!
I didn't receive any True Lemon products free in exchange for a review. I wasn't paid to write this. I just no longer crave soda due to being able to make my own sparkling raspberry lemonade in 1-2 minutes, and thought you might want to know about this, too! Disclosure: Some content includes links to affiliates, which gives me a very small percentage of the sale. You are not obligated to use these links when you make a purchase, but when you do so it helps to support this site, so thank you!
I didn't receive any True Lemon products free in exchange for a review. I wasn't paid to write this. I just no longer crave soda due to being able to make my own sparkling raspberry lemonade in 1-2 minutes, and thought you might want to know about this, too! Disclosure: Some content includes links to affiliates, which gives me a very small percentage of the sale. You are not obligated to use these links when you make a purchase, but when you do so it helps to support this site, so thank you!
Disclosure: Some content includes links to sponsors or affiliates, which give me a small percentage of the sale without costing you anything extra. You are not obligated to use these links when you make a purchase, but when you do so, it helps to support this site, so thank you!
If you've been hanging around Joy In Our Journey for a little while, you probably already know that I have a big love for all things sweet. ♥
While that used to be my downfall in life, now I can eat sweet treats and things without feeling the guilt. No guilt at all! That is so freeing to me!
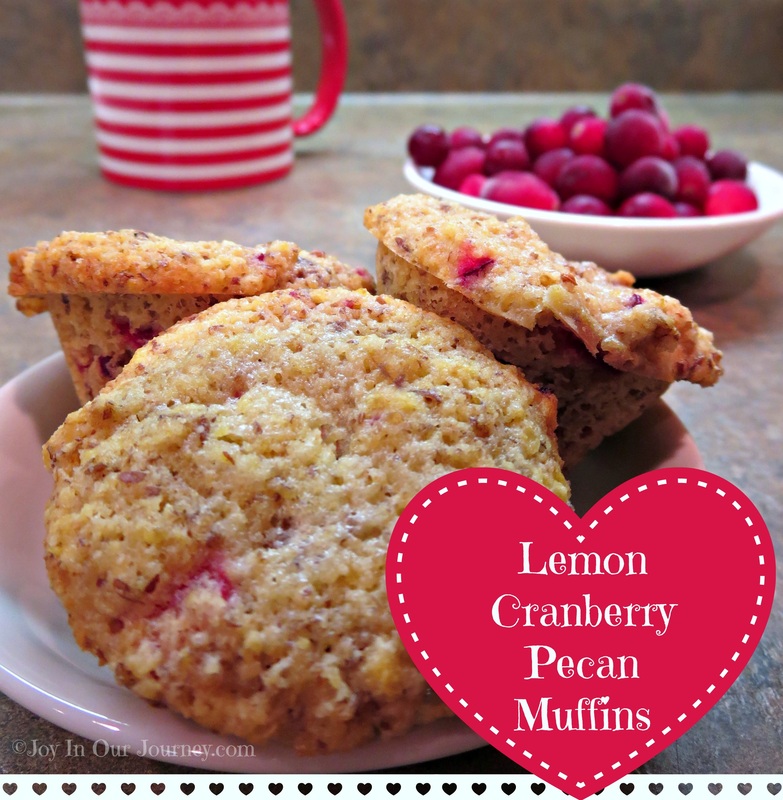
I've always enJOYed muffins of many varieties. One of my favorites was Cranberry Muffins with Creamy Orange Spread. I thought it would be fun to remake my old recipe and turn it into one that is just perfect for those following a Healthy and Trim / low-carb lifestyle plan of eating. If need to eat gluten free or low glycemic or paleo, this is a great muffin recipe for you to try.
Better yet, this is a fun recipe to make for a sweet occasion, like breakfast on Valentine's Day! Hooray for sweetness! ♥

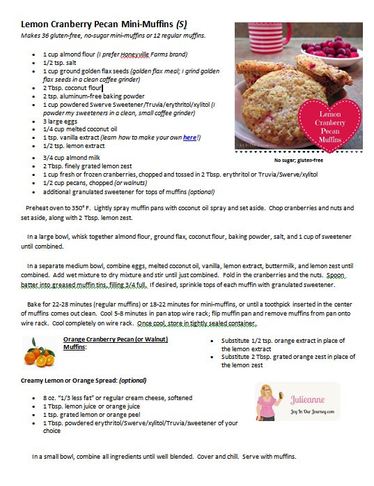
Makes 36 mini-muffins or 12 regular muffins.
- 1 cup almond flour (I prefer Honeyville Farms' brand; it's much more finely ground)
- 1/2 tsp. salt
- 1 cup ground golden flax seeds (golden flax meal; I grind golden flax seeds in a clean coffee grinder)
- 2 Tbsp. coconut flour
- 2 tsp. aluminum-free baking powder
- 1 cup powdered Swerve Sweetener or powdered erythritol (I powder my sweeteners in a clean small coffee grinder)
- 3 large eggs
- 1/4 cup melted coconut oil
- 1 tsp. vanilla extract (learn how to make your own here!)
- 1/2 tsp. lemon extract
- 3/4 cup almond milk
- 2 Tbsp. finely grated lemon zest
- 1 cup fresh or frozen cranberries, chopped and tossed in 2 Tbsp. erythritol or Truvia/Swerve/xylitol
- 1/2 cup pecans, chopped (or walnuts)
- additional granulated sweetener for tops of muffins (optional)
Preheat oven to 350° F. Lightly spray muffin pans with coconut oil spray and set aside. Chop cranberries and nuts and set aside, along with 2 Tbsp. lemon zest.
In a large bowl, whisk together almond flour, ground flax, coconut flour, baking powder, salt, and 1 cup of sweetener until combined.
In a separate medium bowl, combine eggs, melted coconut oil, vanilla, lemon extract, almond milk, and lemon zest until combined. Add wet mixture to dry mixture and stir until just combined. Fold in the cranberries and the nuts. Spoon batter into greased muffin tins, filling 3/4 full. If desired, sprinkle tops of each muffin with granulated sweetener.
Bake for 22-28 minutes (regular muffins) or 18-22 minutes for mini-muffins, or until a toothpick inserted in the center of muffins comes out clean. Cool 5-8 minutes in pan atop wire rack; flip muffin pan and remove muffins from pan onto wire rack. Cool completely on wire rack. Once cool, store in tightly sealed container.
 | Orange Cranberry Pecan (or Walnut) Muffins:
|
Creamy Lemon or Orange Spread: (optional)
- 8 oz. 1/3 less fat cream cheese, softened
- 1 Tbsp. lemon juice or orange juice
- 1 tsp. grated lemon or orange peel
- 1 Tbsp. powdered erythritol/Swerve/xylitol/Truvia/sweetener of your choice
In a small bowl, combine all ingredients until well blended. Cover and chill. Serve with muffins.
Here's the free printable recipe for you to place in your recipe binder:
(click on image, below, to download and save recipe to your computer, or to print it)
 | EnJOY taking a look at my Visual Shopping Guide to help you figure out some of the ingredients and foods that are quick and easy to purchase and prepare! This should help you easily make your own grocery list. |
 This recipe is linked up on Gwen's Nest "Trim Healthy Tuesdays"! Check it out for more new and updated THM recipes! |  |

Happy New Year from Brittany, Julieanne, Elmer, and Kelsi!
You've probably been so busy the last two weeks that you didn't even miss me.
But in case you haven't noticed, I took the last couple of weeks off to focus more on spending time with my family. It was so worth it!
I missed visiting with you all here. December was a very busy month for my family, filled with preparations for Christmas, Kelsi's 16th birthday, our 19th wedding anniversary, Brittany's 3rd annual Christmas party that we host, and many music concerts in which the girls were either singing or playing instruments.
Here's a quick recap of the month of December for the Miller family:
Freak snowstorm . . . and very cold weather for two weeks:
 |  |
For some reason, the area in which we live rarely gets snow. When it snows one inch overnight, it's a "snowstorm" to us! ☺ Not only did we have some beautiful snow, but it got down into the teens. Day after day, the snow hung on and was so beautiful!
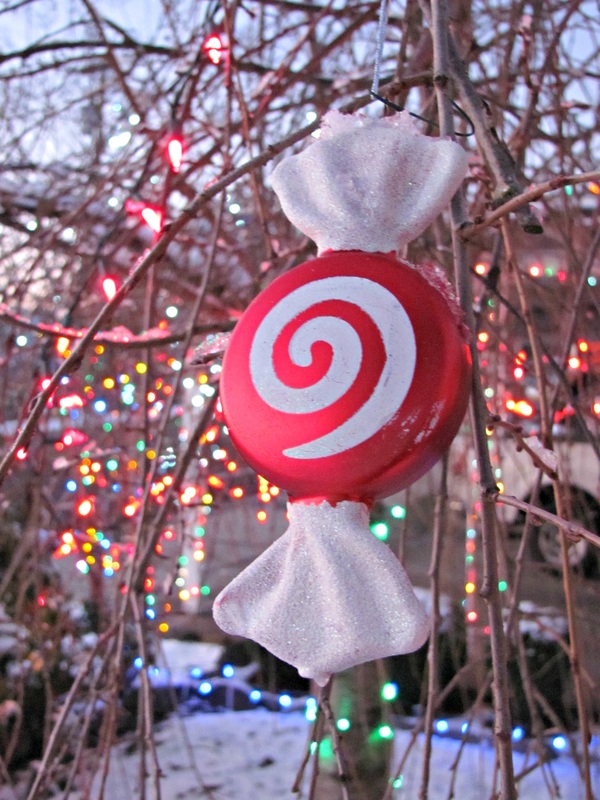
My husband does such a wonderful job at hanging up Christmas lights and decorations outside our home. I love it!
Our Kelsi turns 16!

 | Kelsi, our oldest daughter, turned 16 in December. She is such a treasure to us. She is smart, funny, loves to learn, is talented on the violin, enjoys graphic design and Photoshop, is an excellent teacher, works well with children, follows Christ wholeheartedly, and is just overall such a delight to us. I plan to show you more of her 16th birthday party soon!
|


Annual Gingerbread House decorating:

Brittany's house ~ Kelsi's house
When our girls were around ages 4 and 6, I brought home some gingerbread houses for them to ice and decorate on Thanksgiving evening. At some point in late November or early December each year since that time, the girls decorate gingerbread houses. This is an annual event in our home that has been going on for 10 years now! :) I love seeing the variety of creativity in their finished houses.
Kelsi's Gingerbread House:
 Click to see larger versions of these photos. |  |  |  |
Brittany's Gingerbread House:
 |  |  |  |
Brittany's Teen Christmas Party!
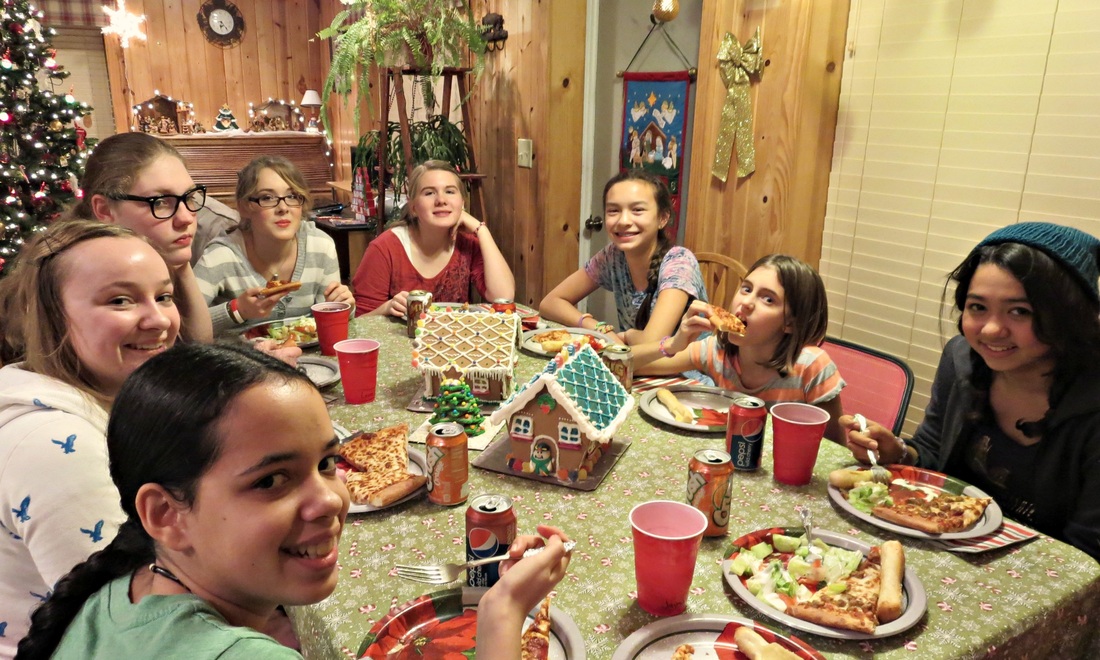
Yeah, we're a bit crazy here...to host a teen girls' Christmas party and sleepover every year, in the midst of everything else that goes on during the month of December. But this has been an annual event for Brittany, our 13-year-old creativity queen, and I hope that if you have teens or know teens in your neighborhood or church, you'll consider hosting a teen Christmas party of your own some time. Fun!
Christmas Eve worship service at church:

Kelsi, our 16-year-old, delights us each Christmas Eve with a violin solo at our Christmas Eve worship service at church. It's such a thrill to hear her play! It brings tears to my eyes. I wish you could hear her.
 Kelsi and Brittany with some of their younger music students |  | 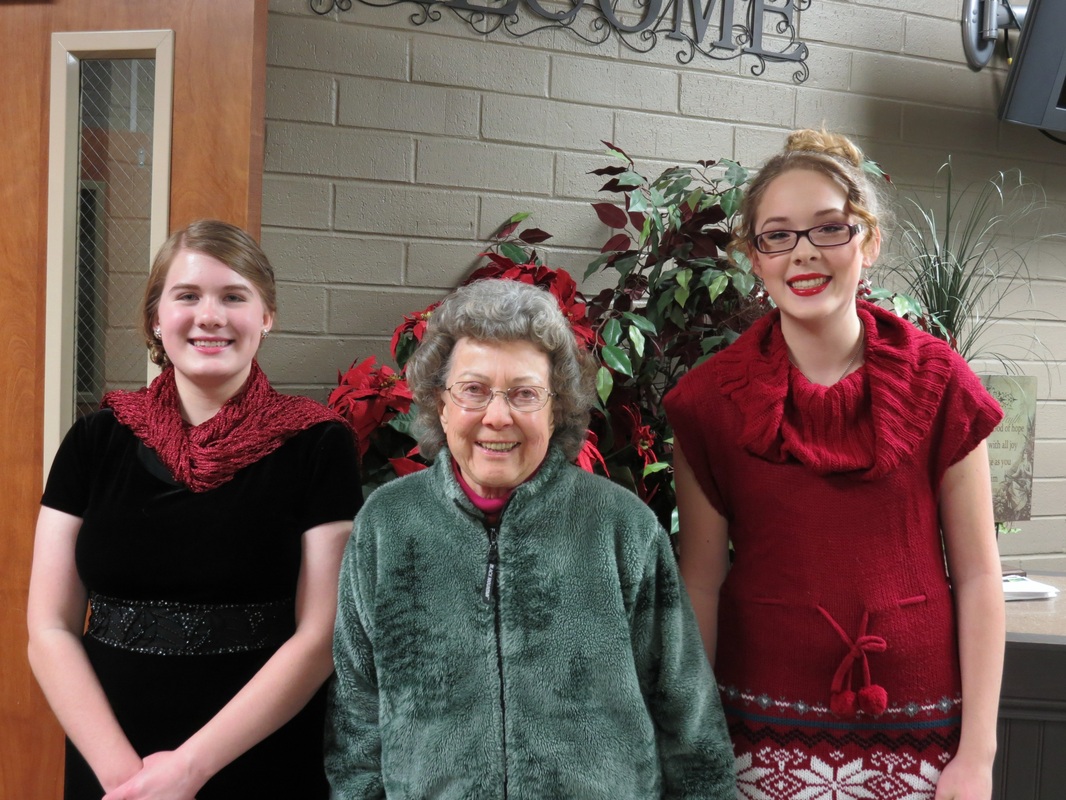 Kelsi, our friend Marge, and Brittany |
Christmas celebration in our home:

After our Christmas Eve worship service at the church we attend, we come home with my parents and our friend, Marge, and enjoy some quiet, contemplative time together.
My mom or I set out Christmas sweets and eggnog or sparkling cider for everyone to enjoy while we either read the Christmas story about the birth of Christ from the book of Luke in the Bible, or we read through Helen Steiner Rice's poem called, The Christmas Guest.
My mom or I set out Christmas sweets and eggnog or sparkling cider for everyone to enjoy while we either read the Christmas story about the birth of Christ from the book of Luke in the Bible, or we read through Helen Steiner Rice's poem called, The Christmas Guest.
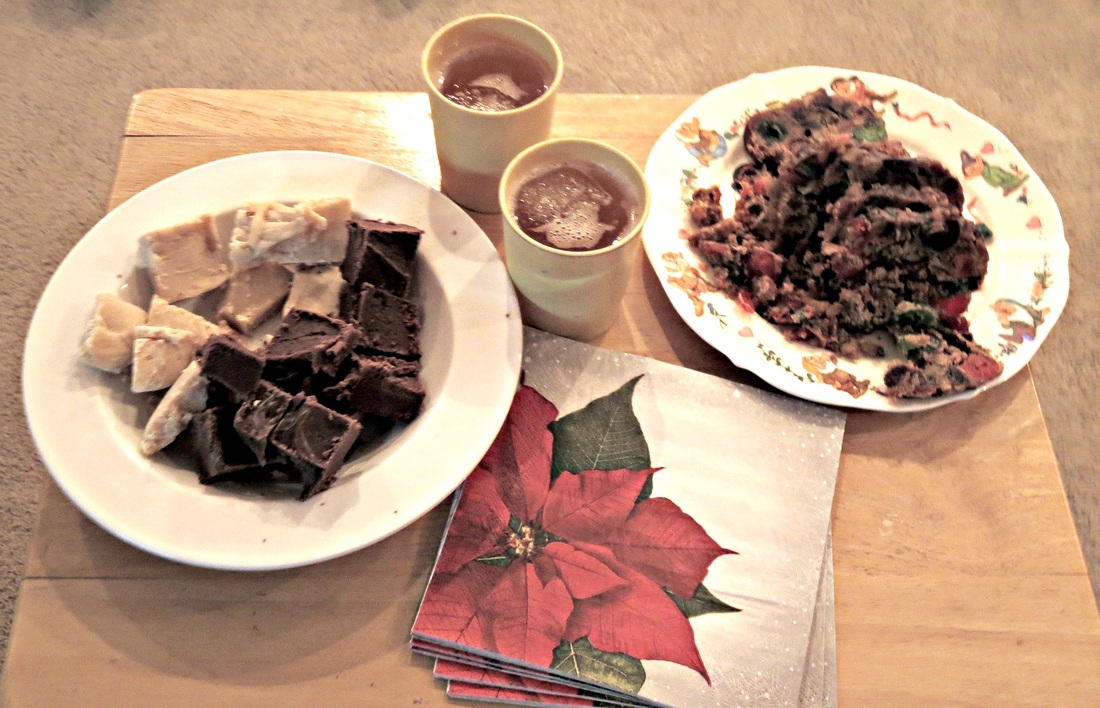
My husband's peanut butter fudge and chocolate fudge; my Christmas fruitcake.
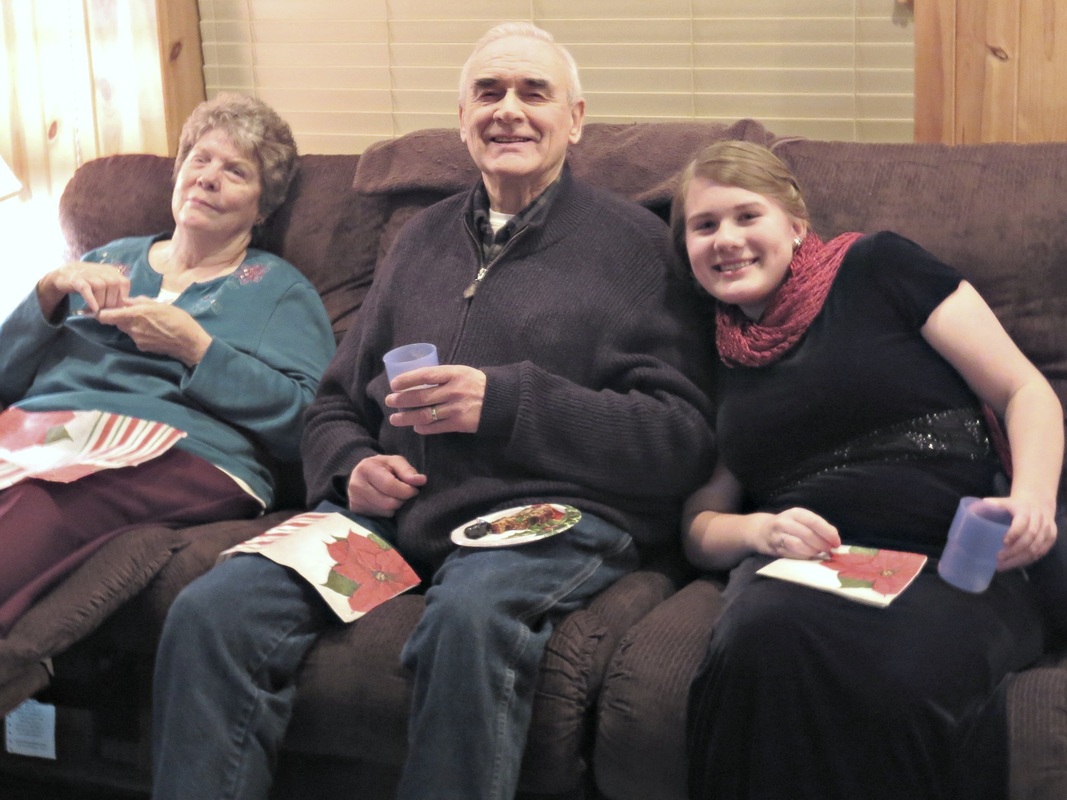
My mom, dad, and Kelsi

...and of course, the crackling fireplace makes the evening seem even more warm and cozy. It is a special time of family memories and traditions that we repeat year after year. I'm so thankful for my family!
I pray that your Christmas and New Year's Eve celebrations provided you with some new, delightful memories for you to treasure. I look forward to celebrating Christ's birth every year...and celebrating His birth every day of the following year, as I should. Thanks be to God for His indescribable gift!
I pray that your Christmas and New Year's Eve celebrations provided you with some new, delightful memories for you to treasure. I look forward to celebrating Christ's birth every year...and celebrating His birth every day of the following year, as I should. Thanks be to God for His indescribable gift!
 | |

Amid the long lists of people to visit, shopping to do, and a Santa on each corner, often the message of CHRISTmas gets lost in the busy-ness of the season.
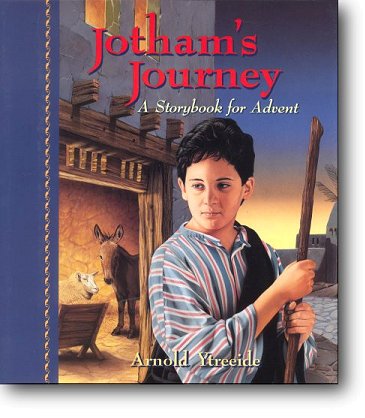
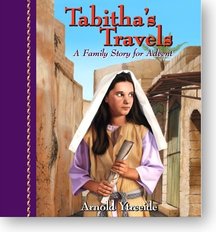
Quite a few years ago, our family chose to simplify some of our Christmas "happenings" and focus more on Christ. We began reading through a fun and meaningful series of 3 books.
Arnold Ytreeide has written some wonderful Advent books that combine action-packed fictional stories set in the time of Jesus' birth with delightful, short advent readings for each night in December. These are written so well that Elmer and I have enjoyed each moment reading through them, too!
 |  This page may contain affiliate links. |  |
Each year, right after Thanksgiving, we would begin reading one of these three books:
for our family's regular evening worship time with Advent. These three stories fascinated our girls when they were younger (about age 7+), and now that they are in jr. high/high school, they still are enjoying the stories and Advent readings! (And so are Elmer and I...heh, heh!)
We simplified our gift-giving list; we actually decided to make fewer Christmas candies and goodies; etc. This year, we are decorating our home with our traditional Christmas decorations as well as these symbols of peace that my daughter, Kelsi, and I designed.
People have seemed to enjoy the free October Autumn PumpkinScripture printables we made for October, and the November "Leaves of Thanks" Scripture printables, so we decided to make some free printable Scripture decorations for December and CHRISTmas for you to enjoy!
(Email subscribers will want to click on the title of this blog post to view the graphics and to download the three pages of Christmas Peace for your use.)
| Here's a closer view of the two types of CHRISTmas decorations we've designed:  |  |
If you would like to print out these 3 pages of CHRISTmas Peace for your own personal family use, or in your classroom or Sunday School class, just click on the page, below. White or cream-colored cardstock works well for printing these three pages. If you desire, feel free to laminate them for future use. Merry CHRISTmas to you and your family!
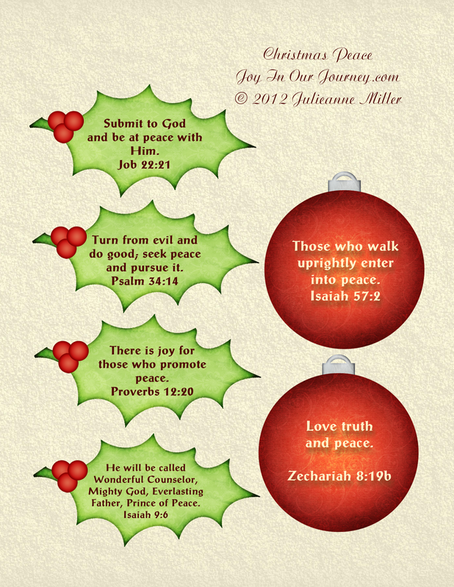
Please remember that these CHRISTmas Peace printables are copyrighted and are not to be shared on another website without permission from Joy In Our Journey.com. Thanks!
 | |

This Thursday, December 5th at 8 p.m. (7 p.m. Central) on NBC
My endearment toward the musical, "The Sound of Music", goes clear back to when my twin sister and I were babies...and when our little brother joined our family when we were 2-1/2 years old.
Guess what song my parents sang to us each night when they tucked us into bed?
Edelweiss!
When our oldest, Kelsi, was a baby, you can probably figure out which song we sang to her each night:
Edelweiss!
In fact, we still sing Edelweiss to our girls occasionally when we say goodnight to them at bedtime. Even as teenagers, they love it - along with the back scratches we give them while we sing. ☺

As a junior higher, I loved playing music from my mom's The Sound of Music piano book. Some of the songs were a bit too difficult for me, but I still enjoyed trying to play them.
Now my daughter, Brittany, has fun playing out of the same book!

When I heard that NBC was going to remake The Sound of Music, I was skeptical - yet curious. What I didn't realize at first was that this was going to be a LIVE event, on stage, as if I was sitting down in my living room, watching a live Broadway show! Wow. There will be no "Take 2" on Thursday night. That takes courage these days!
Hmm...can anything top the original movie? The acting? The original soundtrack?
Well, I decided to find out. I watched The Making of The Sound of Music Live to see if I could get any clues about whether or not the new, live version would be worth my time. I really enjoyed seeing the casting of the characters take place. As far as the actual acting goes, I can't really tell. I'll have to wait until Thursday night to find out...but the dancing looks wonderful!

The "new" von Trapp children!
After listening to portions of the songs from The Sound of Music on iTunes (not an affiliate link), I can wholeheartedly state that I believe the new music is as good as the original. It is simply beautiful!
I'm so excited about watching The Sound of Music - LIVE this Thursday that I've invited some friends over to have a The Sound of Music LIVE Viewing Party with me. Fun!
I'd love to let you in on what I have planned for that night, including dinner, but I don't want to give it away to my friends just yet. So stay tuned! I'll be sharing here how we celebrated the release of this new classic musical with our friends.
Here's a little preview of the upcoming LIVE broadcast this Thursday evening, December 5th at 8 p.m. (7 p.m. Central) on NBC. I hope you can work The Sound of Music - LIVE into your evening on Thursday! Let me know what you thought of it.
 | |

This page may contain affiliate links.
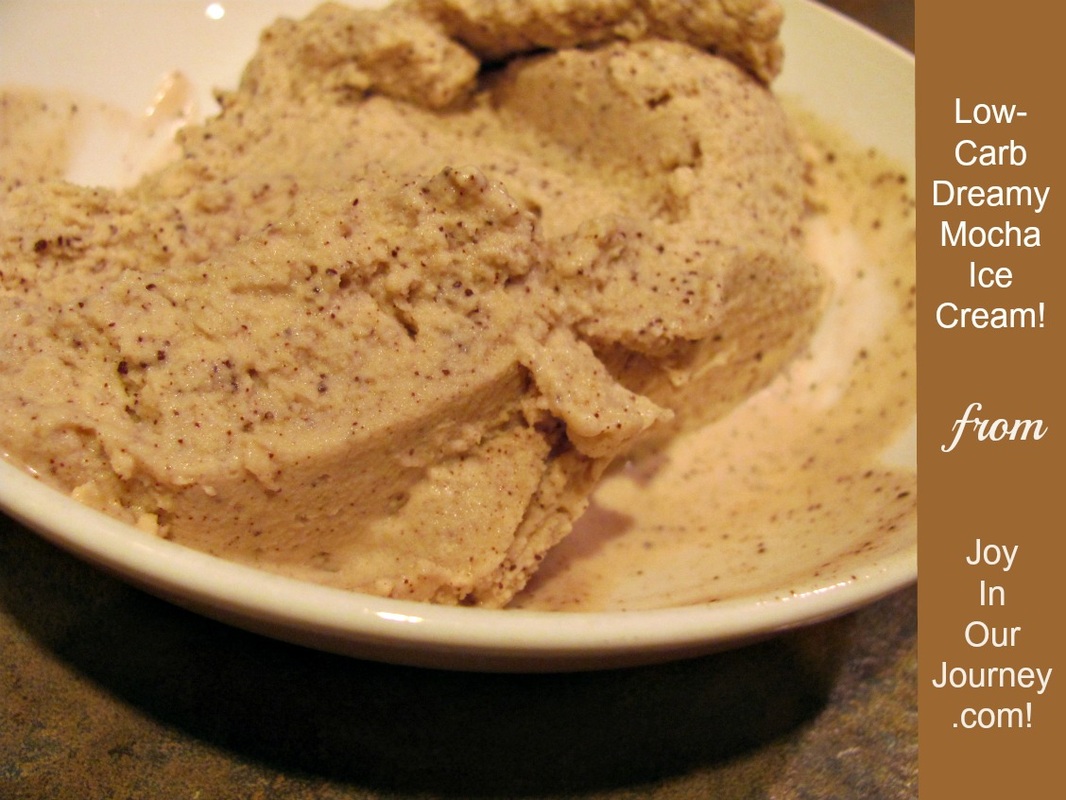 | I've always loved coffee-flavored foods, but would you believe that I didn't start enJOYing a cup of coffee until I was around 40 years old? Of course, that cup of coffee was probably half cream and sugar, by the time I added enough sweet and creamy goodness to make it not taste bitter. ☺ |
A couple of weeks ago, I introduced you to making your own Chocolate Extract. This week, it's time to learn how to make your own Coffee Extract! I love to use coffee extract in my favorite homemade ice cream: Low-Carb Homemade Mocha Ice Cream! It also works beautifully in mocha shakes, smoothies, and puddings.
This extract is one of the wonderful ingredients that is helping my family stay "on plan" with Trim Healthy Mama, a low-glycemic style of eating. We get to eat so many delicious desserts and continue to lose weight!
First things first: Coffee Extract will almost always contain some form of alcohol, used as a natural preservative.
If you prefer to make a non-alcoholic coffee extract, keep in mind that you'll need to freeze this if you would like to keep it on hand long-term. To replace 2 tablespoons of coffee liqueur or extract, use 1/2 to 1 teaspoon of non-alcohol Chocolate Extract mixed with 1 teaspoon of instant coffee, which has been dissolved in 2 Tablespoons of water. Can also substitute expresso, non-alcoholic coffee extract; or coffee-flavored syrup.
 | For those of you who are ready to make regular Coffee Extract suitable for long-term storage without refrigeration or freezing, you'll need to decide if you'd like gluten-free Coffee Extract, or whether or not that matters to you. I prefer to make my extracts so they are gluten-free, for guests who require that as part of their diet. When out and about, shopping for gluten-free vodka or other forms of alcohol, look for products that have been distilled from potatoes. Yup, you heard me right. No grains, if you want this to be gluten-free. |
Coffee extract has two simple ingredients: coffee and vodka. How easy is that? !!!
(Note: you may also use white wine or gin, or even brandy or cognac.)
(Note: you may also use white wine or gin, or even brandy or cognac.)
 | What You'll Need:
|
 Grind up enough coffee beans to measure 1/2 cup. You may also use whole coffee beans in your blender, if it's powerful enough to blend those up well. If you'd like your extract really strong, add more coffee! | 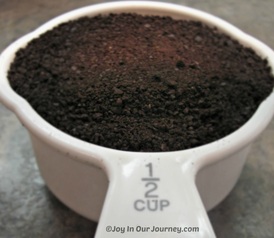 Or, measure out 1/2 cup of instant coffee crystals. There's no need to be "exact" in your measurements, though. Different measurements will just adjust the strength of your extract. |
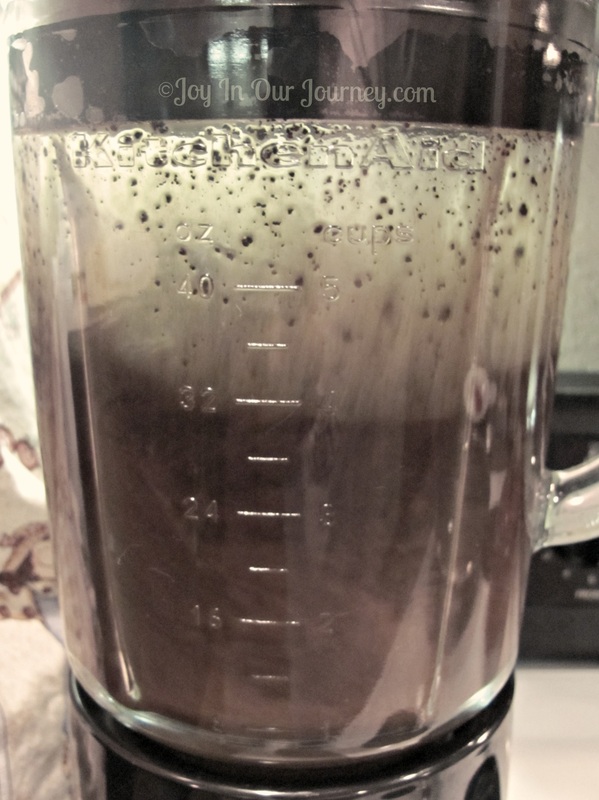
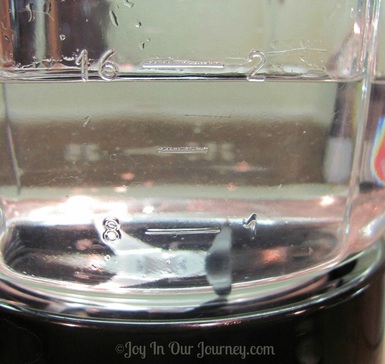 | Measure 1.5 to 2 cups of vodka or other alcohol into your blender. Consider the size of the container you'll be storing this in. If you'll be using a pint jar, measure about 1-3/4 cups of vodka into the blender to allow room for the coffee beans/crystals. |
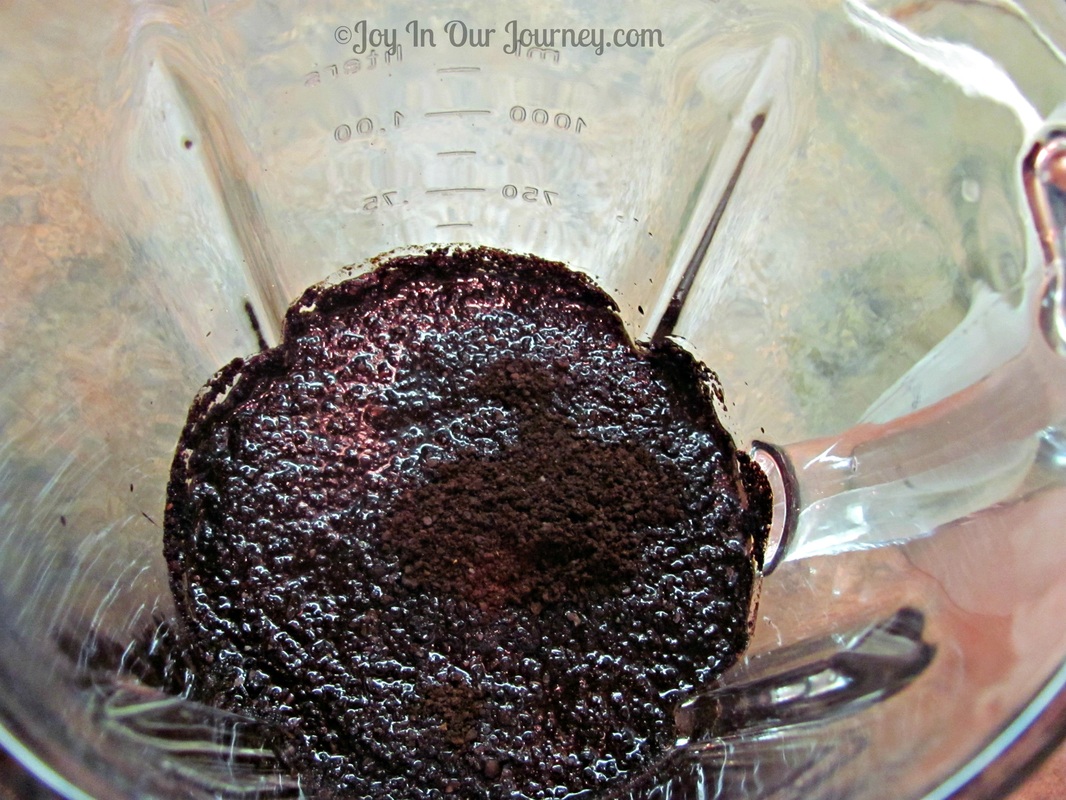 | Add coffee beans or measured ground coffee to the vodka/alcohol in your blender. Blend for 5 minutes. |
 | If you blend too long and the mixture gets too hot, you'll lose some of the preserving benefits of the vodka/alcohol. In other words, if you have a high powered blender like a Vitamix or a Blendtec, you may want to shorten the length of blending time. You don't want to open up the blender and see the extract liquids boiling! |
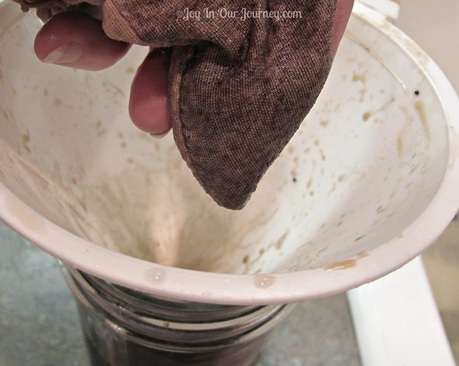
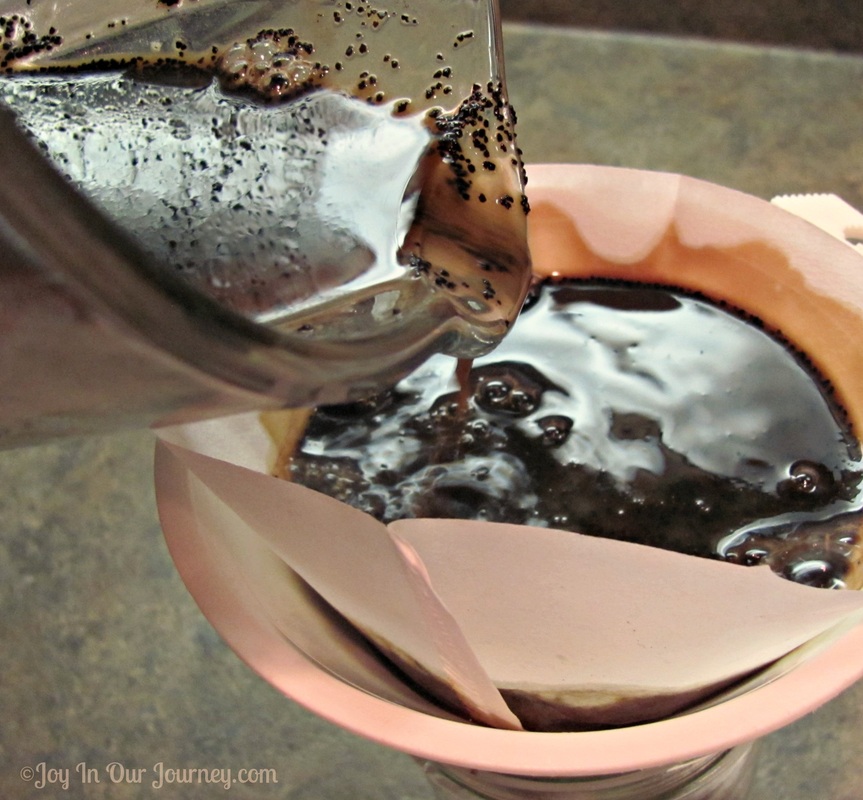 | My first attempt to strain the coffee extract was a big fail. I lined a funnel with a coffee filter, but even after 10 minutes of sitting, it had only strained a tiny amount. 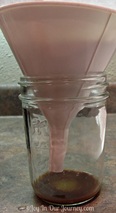 |
 | I didn't wait 24 hours or longer to see if the coffee would continue to strain well with the coffee filter/funnel. I was anxious to finish this process! Instead, I grabbed a fabric jelly bag and poured the extract through the bag. After pouring off all of the liquid, I squeezed the bag carefully to remove any last bit of liquid extract. Next time, I'll line a quart canning jar with some muslin or similar fabric, fastening it around the edges of the jar with a strong rubberband, and pour the liquid coffee extract through the fabric. That will be much easier! |
If you're interested in a double extraction, pour this strained liquid back into your blender, add more coffee, and repeat the blending and straining process a second time. This makes the coffee extract even more potent and strong.
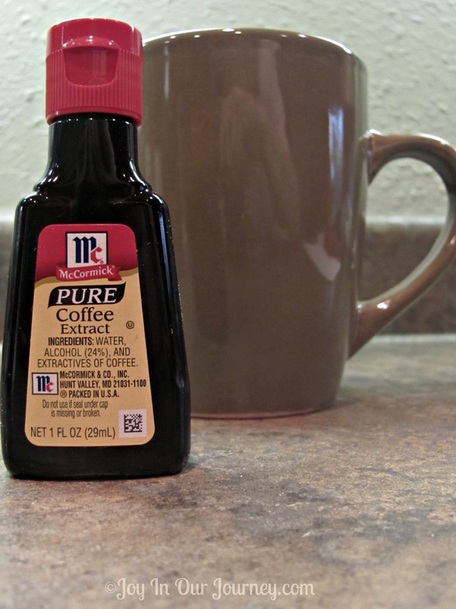 | I'm thrilled that I no longer need to purchase expensive coffee extract! This was so easy to make, even with an inexpensive blender. If you'd like this to be flavored, you may also add some almond extract, peppermint extract, cinnamon, or other flavors of your choice, to the finished product. I would recommend avoiding extracts that contain propylene glycol. If you use cardamom pods or the powdered herb blended with the coffee, this will neutralize the effects of the caffeine (decaffeinate it). Some people will drink half a shot of the coffee extract to perk them up in the morning or before a big test. I don't know that I recommend doing that, but then, I'm not a medical professional - nor a coffee addict. Ha! Below, you'll see the recipe ready for you to print out. |
Coffee Extract doesn't need to be refrigerated, and can be stored indefinitely for your baking and cooking uses. After you have followed this recipe, it's completely ready to be used; there's no need to store this for months until it reaches potency. However, you'll want to store your Coffee Extract in a dark cupboard or closet.
The full recipe for Homemade DIY Coffee Extract:
Pour measured vodka or other alcohol into blender. Add ground coffee, coffee beans, or instant coffee crystals. Add additional extract flavorings, if desired, or ground cardamom or pods if you'd like the extract to be decaffeinated.
Blend for up to 5 minutes in your blender; for high-powered blenders like Vitamix or Blendtec, don't blend so long that the mixture gets too hot.
Line a jar or container with muslin or other straining/jelly bag type of fabric. Fasten fabric securely to the edge of the jar with a strong rubberband.
Pour blended coffee mixture into straining bag or fabric. Squeeze liquid from bag or fabric. You now have coffee extract! Repeat process a second time using strained liquid to make a double extract, if desired.

Ingredients and Supplies:
- 1-1/2 to 2 cups vodka (if needing gluten-free, use potato mash vodka or other non-grain alcohol)
- 1/2 cup coffee beans or ground coffee beans, or instant coffee
- 2- to 4-cup glass jar with tight-sealing lid
- blender
- muslin bag/jelly bag or fabric/rubberband (generally available at hardware stores)
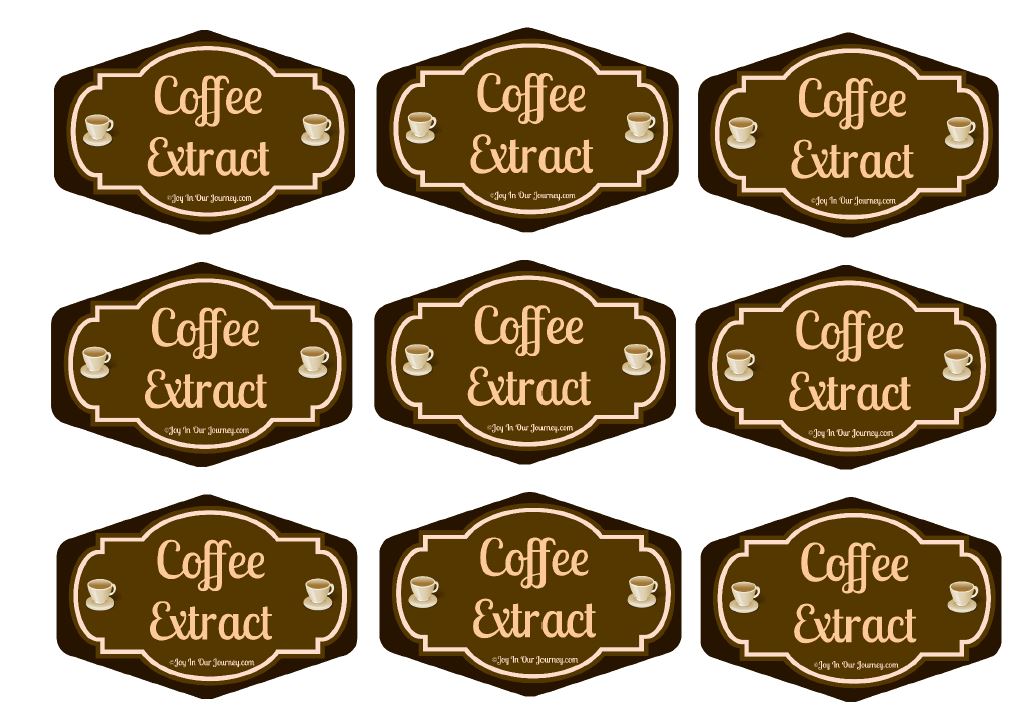
Here's a free printable sheet of labels you may use to decorate your jars!
(Those of you receiving this blog post via email subscriptions may need to click through to the actual post to view and print off the Homemade Coffee Extract labels.) Click on the image, below, to open up the PDF document containing the Coffee Extract labels.
 | Coffee Extract may be used with any type of recipe you'd like! If you're using the Trim Healthy Mama way of cooking, you may enJOY taking a look at my new Visual Shopping Guide for Trim Healthy Mama...a virtual shopping list of ideas when you are grocery shopping. |
 | |
In the interest of full disclosure, some of the links in my posts are “affiliate links.” This means if you click on the link and purchase the item, I receive an affiliate commission...without it costing you a penny more. I only recommend products I use personally. Your purchases through these links help support Joy In Our Journey. I humbly thank you for your support!
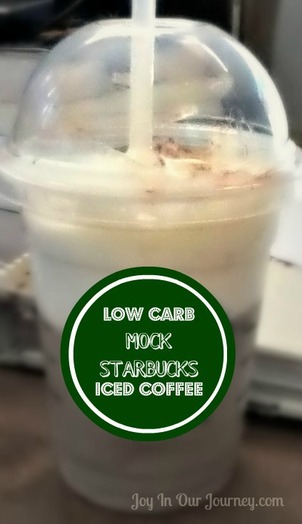 This page may contain affiliate links. |  My daughter, Brittany Wow. My daughter, Brittany, just made a super delicious vanilla-chocolate iced coffee! It may seem like a strange combination, but the chocolate isn't strong enough to overpower the vanilla, and it's the perfect marriage of flavors! Be sure to add your own creative flavors to your coffee to make it just how you like it. To make this into a frappuccino, put it in the blender with even more ice. For those of you following the Trim Healthy Mama lifestyle eating plan, you'll love this frugal, yummy recipe! |
Perfect Low-Carb Mock Starbucks Iced Coffee!
Ingredients:
1. Make one strong cup of coffee in a French Coffee Press. (I like the quality of coffee made in French Presses. If you're not familiar with French Coffee Presses, you can find some here.) If you don't have a French Press and don't want to wait to order one, just make a very strong cup of coffee! Do not remove the coffee grounds. Pour a little under 2/3 of the coffee in a large cup that has been completely filled with ice to cool it down.
2. Remove about half of the ice once it is cold, and pour the coffee and remaining ice into the cup you'd like to serve your iced coffee in.
3. Back to the French Press: with the used grounds still remaining, grind one heaping scoop of coffee and put it in the French Press with the remaining coffee. Wait 3 minutes, then press down the French Press' handle and filter to make the coffee.
4. Pour that ultra-strong coffee into a syrup pitcher. Set aside. Then, add about 1/8 - 1/2 tsp. or to taste of chocolate extract, vanilla or vanilla syrup to taste, 4-8 drops chocolate liquid stevia, about 1-4 Tbsp. heavy cream to taste, and the ultra-strong coffee. Mix with a straw, stir stick, or spoon. Top with whipped cream and dust with cocoa powder.
Voilà! Perfect vanilla-chocolate iced coffee!
Now you can enjoy delicious cold, sweet coffee without paying an arm and a leg at Starbucks, or guzzling all those carbs! I know Torani has Splenda in it, so you may omit it and use vanilla extract instead, and add more chocolate stevia to make up for the Splenda. It would be just as yummy, if not better!
Thanks, Brittany, for sharing a homemade, frugal way to enjoy a Starbucks-type of iced coffee beverage in our own homes!
Ingredients:
- fresh ground coffee beans
- ice
- your choice of flavors:
- chocolate extract
- Torani sugar-free vanilla syrup (if desired) or pure vanilla extract or Totonac stevia-sweetened vanilla syrup
- chocolate liquid stevia, if desired
- heavy cream
- cocoa powder
1. Make one strong cup of coffee in a French Coffee Press. (I like the quality of coffee made in French Presses. If you're not familiar with French Coffee Presses, you can find some here.) If you don't have a French Press and don't want to wait to order one, just make a very strong cup of coffee! Do not remove the coffee grounds. Pour a little under 2/3 of the coffee in a large cup that has been completely filled with ice to cool it down.
2. Remove about half of the ice once it is cold, and pour the coffee and remaining ice into the cup you'd like to serve your iced coffee in.
3. Back to the French Press: with the used grounds still remaining, grind one heaping scoop of coffee and put it in the French Press with the remaining coffee. Wait 3 minutes, then press down the French Press' handle and filter to make the coffee.
4. Pour that ultra-strong coffee into a syrup pitcher. Set aside. Then, add about 1/8 - 1/2 tsp. or to taste of chocolate extract, vanilla or vanilla syrup to taste, 4-8 drops chocolate liquid stevia, about 1-4 Tbsp. heavy cream to taste, and the ultra-strong coffee. Mix with a straw, stir stick, or spoon. Top with whipped cream and dust with cocoa powder.
Voilà! Perfect vanilla-chocolate iced coffee!
Now you can enjoy delicious cold, sweet coffee without paying an arm and a leg at Starbucks, or guzzling all those carbs! I know Torani has Splenda in it, so you may omit it and use vanilla extract instead, and add more chocolate stevia to make up for the Splenda. It would be just as yummy, if not better!
Thanks, Brittany, for sharing a homemade, frugal way to enjoy a Starbucks-type of iced coffee beverage in our own homes!
 | |
This page may contain affiliate links.

Click to PIN this recipe!
I don't know about you, but I've been seeing all these delicious-looking photos and recipes on Facebook and Pinterest that involve pumpkin.
Unfortunately, they all also involve sugar and flour, which are no-no's for me.
I was starting to feel a bit sorry for myself.
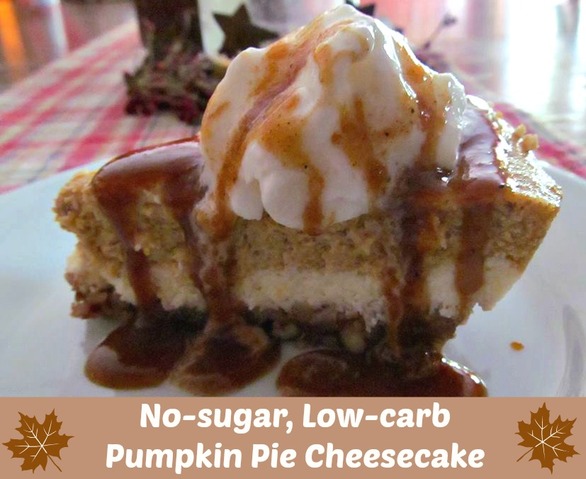
Thankfully, JoAnna Schrock, a fellow Trim Healthy Mama follower, developed this divine recipe for Pumpkin Pie Cheesecake. Because this contains fats and few carbs, this is an S-style dessert (for Trim Healthy Mama users, S = Satisfying!)
Let me warn you: make this when no one is home. Clean up the kitchen, and don't tell anyone you have this chillin' in the fridge. Because you'll want this dessert all to yourself. Yes, you will!
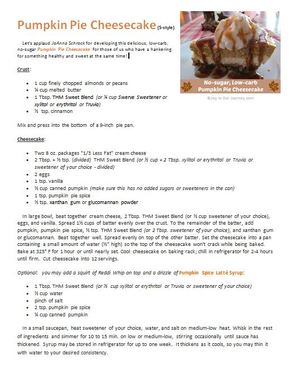
Here's JoAnna's wonderful recipe, with a FREE PRINTABLE PDF version for your recipe binder:

Pumpkin Pie Cheesecake (S-style)
Let's applaud JoAnna Schrock for developing this delicious, low-carb, no-sugar Pumpkin Pie Cheesecake for those of us who have a hankering for something healthy and sweet at the same time!
Please comment below and let us know how you like this new recipe!
Crust:
Mix and press into the bottom of a 9-inch pie pan.
Cheesecake:
In large bowl, beat together cream cheese, 1/2 cup sweetener of your choice, eggs, and vanilla. Spread 1-1/2 cups of batter evenly over the crust. To the remainder of the batter, add pumpkin, pumpkin pie spice, 2 Tbsp. sweetener of your choice, and xanthan gum or glucomannan. Beat together well. Spread evenly on top of the other batter. Set the cheesecake into a pan of water so it won't crack while being baked. Bake at 325° F for 1 hour or until nearly set. Cool cheesecake on baking rack; chill in refrigerator for 2-4 hours until firm. Cut cheesecake into 12 servings.
Optional: you may add a squirt of Reddi Whip on top and a drizzle of Pumpkin Spice Latté Syrup.
Pumpkin Spice Latté Syrup:
In a small saucepan, heat sweetener of your choice, water, and salt on medium-low heat. Whisk in the rest of ingredients and simmer for 10 to 15 min. on low or medium-low, stirring occasionally until sauce has thickened. Syrup may be stored in refrigerator for up to one week. It thickens as it cools, so you may thin it with water to your desired consistency.
- 1 cup finely chopped almonds or pecans
- 1/4 cup melted butter
- 1 Tbsp. THM Sweet Blend (or 1/4 cup Swerve Sweetener or xylitol or erythritol or Truvia)
- 1/2 tsp. cinnamon
Mix and press into the bottom of a 9-inch pie pan.
Cheesecake:
- Two 8 oz. packages "1/3 Less Fat" cream cheese
- 2 Tbsp. + 1/2 tsp. (divided) THM Sweet Blend (or 1/2 cup plus 2 Tbsp. xylitol or erythritol or Truvia (or sweetener of your choice)
- 2 eggs
- 1 tsp. vanilla
- 1/2 cup canned pumpkin (make sure this has no added sugars or sweeteners to the can)
- 1 tsp. pumpkin pie spice
- 1/2 tsp. xanthan gum or glucomannan powder
In large bowl, beat together cream cheese, 1/2 cup sweetener of your choice, eggs, and vanilla. Spread 1-1/2 cups of batter evenly over the crust. To the remainder of the batter, add pumpkin, pumpkin pie spice, 2 Tbsp. sweetener of your choice, and xanthan gum or glucomannan. Beat together well. Spread evenly on top of the other batter. Set the cheesecake into a pan of water so it won't crack while being baked. Bake at 325° F for 1 hour or until nearly set. Cool cheesecake on baking rack; chill in refrigerator for 2-4 hours until firm. Cut cheesecake into 12 servings.
Optional: you may add a squirt of Reddi Whip on top and a drizzle of Pumpkin Spice Latté Syrup.
Pumpkin Spice Latté Syrup:
- 1/2 cup xylitol or erythritol or Truvia (or sweetener of your choice)
- 1/2 cup water
- pinch of salt
- 2 tsp. pumpkin pie spice
- 1/4 cup canned pumpkin
In a small saucepan, heat sweetener of your choice, water, and salt on medium-low heat. Whisk in the rest of ingredients and simmer for 10 to 15 min. on low or medium-low, stirring occasionally until sauce has thickened. Syrup may be stored in refrigerator for up to one week. It thickens as it cools, so you may thin it with water to your desired consistency.
 | JoAnna Shrock's Pumpkin Pie Cheesecake recipe contains 15.9 grams of fats per serving, and 2.7 net grams of carbs per serving. Yes! |
Free PDF printable recipe page for you!
Click on the recipe page, below, to download and print this recipe!
If you have a "sweet tooth" like me, take a peek at my
Trim Healthy Mama-inspired desserts! ☺
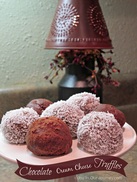 Chocolate Cream Cheese Truffles (THM - S) | 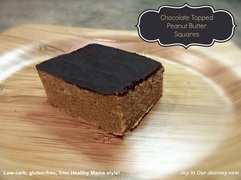 Chocolate Topped Peanut Butter Squares (THM - S) | 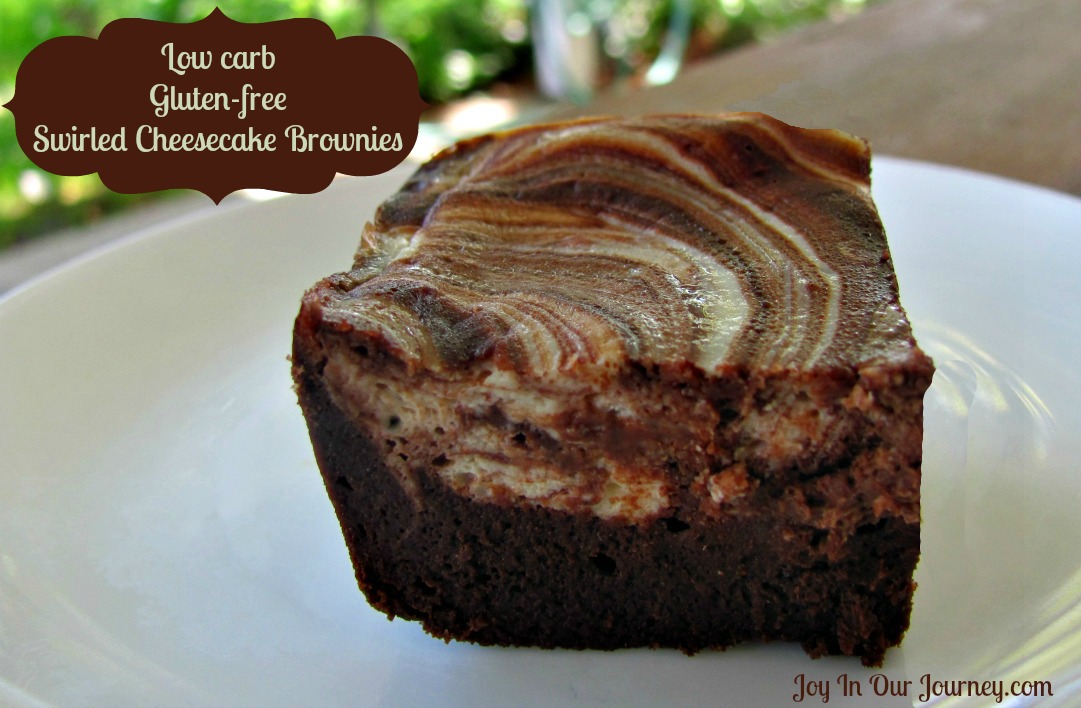 Swirled Cheesecake Brownies (Low carb, THM-S, Gluten free) |
 If you're using the Trim Healthy Mama way of cooking, you may enJOY taking a look at my new Visual Shopping Guide for Trim Healthy Mama...a virtual shopping list of ideas when you are grocery shopping! |  |
In the interest of full disclosure, some of the links in my posts are “affiliate links.” This means if you click on the link and purchase the item, I receive an affiliate commission. I only recommend products I use personally. Your purchases through these links help support Joy In Our Journey. I humbly thank you for your support!

Hi! I'm Julieanne!
You'll find me in the kitchen
trying new Trim Healthy Mama recipes, loving God, and carrying out that love as I bless my husband and teen daughters.
Find
Joy In Our Journey on:
Sign up to receive
Joy In Our Journey's
latest blog posts, freebies, and more!
Joy In Our Journey's
latest blog posts, freebies, and more!


I'd love to share your product with my readers. If you would like me to do a review and giveaway, just contact me via email and let me know how I can help.
Disclosure: Some content includes links to sponsors or affiliates, which
give me a small percentage of the sale without costing you anything
extra. You are not obligated to use these links when you make a
purchase, but when you do so, it helps to support this site, so thank
you!
Search
Joy In Our Journey
Loading
Archives
December 2016
August 2015
July 2015
March 2015
February 2015
January 2015
December 2014
November 2014
October 2014
September 2014
August 2014
July 2014
June 2014
May 2014
April 2014
March 2014
February 2014
January 2014
December 2013
November 2013
October 2013
September 2013
August 2013
July 2013
June 2013
May 2013
April 2013
March 2013
February 2013
January 2013
December 2012
November 2012
October 2012
September 2012
August 2012
July 2012
June 2012
May 2012
April 2012
March 2012
February 2012
January 2012
December 2011
November 2011
October 2011
September 2011
August 2011
July 2011
June 2011
May 2011
April 2011
March 2011
February 2011
January 2011
December 2010
November 2010
October 2010
September 2010
August 2010
July 2010
June 2010
May 2010
Photos from jaakko.hakulinen, theglobalpanorama, Sarah Korf, jeffreyw, crayonmonkey, Joshua Singh, Sam Howzit, kimberlyac, miggslives, rust.bucket, Derick Leony, Big D2112, Violette79, Andrea.Pacheco, youngthousands, niiicedave, mommyknows, Dominic's pics, sleepyneko, madaise, Daquella manera, Arild Andersen, TounoTouji, jchapiewsky, dennis, cooper.gary, supersum (off), advisorymatters, Nomadic Lass, Effervescing Elephant, ralph and jenny, alubavin, brendan-c, ImNotQuiteJack, jeffreyw, iamlemonfilm, Colin_K, Andrew Michaels, ivoryelephantphotography, bennylin0724, Jo Naylor, daveoratox, f10n4, Bludgeoner86, Ack Ook, BiblioArchives / LibraryArchives, pylbug, limaoscarjuliet, Barbara L. Hanson, CapitalK buy design, Vibragiel, matthiasxc, Podknox, qnr, Sadie_Girl, ComputerHotline, pppspics, Anna Loverus, Joi, Rob.Bertholf, Sheyla Ruiz, nachans, ♥serendipity, IsaacMao, *cart-wheels*, TRFPhotography, vxla, lisaclarke, Missouri History Museum, doortoriver, sunshinecity, anna gutermuth, USCPSC, L. Allen Brewer, bluebirdsandteapots, ell brown, vestman, *PaysImaginaire*, mightyohm, Lars Plougmann, Alex_Lewis116, yoppy, HealthGauge, 401(K) 2013, aprilandrandy, Ben Sutherland, Mason Masteka, WillowGardeners, MStewartPhotography, “Caveman Chuck” Coker, kodomut, DanCentury, TrishaLyn, Katie@!, Looking Glass, Nicholas_T, Francis Storr, Allie_Caulfield, Creative Tools, Aidan Jones, Tim Brown Architecture, HerryLawford, Brett Levin Photography, Gudlyf, Chocolate Reviews, greggoconnell, EmilyWhitwam, Phú Thịnh Co, ilovememphis, cliff1066™, Chi King, erix!, Tony Fischer Photography, GlasgowAmateur, ktylerconk, cfourcalvin, David Locke, blhphotography, dominiqs, quinet, stevendepolo, surlygirl, guzzphoto, mikebaird, rich701, coolmikeol, procsilas, • Happy Batatinha •, pmarkham, Luz Adriana Villa A., LisaW123, fireballsedai, CJS*64, gagilas, Christian Haugen, freddie boy, tausend und eins, fotografik, roland, nedradio, makelessnoise, Salvation Army USA West, TheAlieness GiselaGiardino²³, Arenamontanus, 401(K) 2013, f_mafra, trippingbobcat, brooklyn, Viajar24h.com, yanajenn, jamieanne, hardworkinghippy, ccharmon, eofstr, Julia Manzerova, jhoc, Orin Zebest, battlecreekcvb, jmrodri, trekkyandy, timsnell, Salil Wadhavkar, ewen and donabel, Ted Van Pelt, David Paul Ohmer, Kevin May, CCAC North Library, I_Nneska, AlphaTangoBravo / Adam Baker, dwstucke, Bonnie B., elise.y, Bill Selak, sam_churchill, JD Hancock, olga.palma, cbr_case, acme, alyak, creating in the dark, TrishaLyn, jacilluch, hans s, cwwycoff1, Karen Roe, AlexiUeltzen, surrelmar, Jeff Kubina, rich701, adie reed, pacificbro, dwstucke, rharrison, avlxyz, Jim, the Photographer, Danndalf, storebukkebruse, rodaniel, dicktay2000, exfordy, torres21, Mr. T in DC, avlxyz, andrealindenberg, HarshLight, stevendepolo, publicenergy, Jan Tik, aechempati, ume-y, xfce, Pink Sherbet Photography, nlian, bittle, bradleygee, rs-foto, JamieDrakePhotos, SimonDoggett, slopjop, Norman B. Leventhal Map Center at the BPL, BozDoz, GoRun26, prettyinprint, WTL photos, Minnesota Historical Society, www.bluewaikiki.com, stevendepolo, LibAmanda, jspatchwork, Jinx!, ncmichael2k3, Clevergrrl, michaelkmak, Generationbass.com, Dougtone, roger4336, slgckgc, twicepix, lisatozzi, Lee Nachtigal, Kevin Lawver, brianfuller6385, jamieanne, quinn.anya, SupremeCrete, StockMonkeys.com, OliverN5, jeffreyw, Muffet, krossbow, fdecomite, JeepersMedia, jimmiehomeschoolmom, Zanastardust, joyosity, frotzed2, szapucki, Vincent van der Pas, normalityrelief, Emily Carlin, Clevergrrl, allyrose18, sleepyneko, Jeff Kubina, efleming, Artman1122, notjustsquirrels, PhotoAtelier, roolrool, onnola, Charles Williams, greggoconnell, Highway Patrol Images, andrechinn, loop_oh, ayustety, toinerooijmans, vmiramontes, Claricethebakergardener, mind on fire, jimmiehomeschoolmom, Kat Johnston / Sanura Sakai, toinerooijmans, rfduck, stu_spivack, OmegaPoint, ingridtaylar, AdamSelwood, Gog Llundain, pbody
