
|
For the last couple years, ever since I discovered The Pioneer Woman's website, I've gone to HP's Creative Studio website and personalized a free "The Pioneer Woman" calendar to download and print. This year, my calendar for 2012 has gone from this (the basic version): 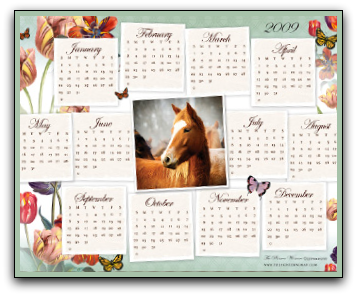 to this! 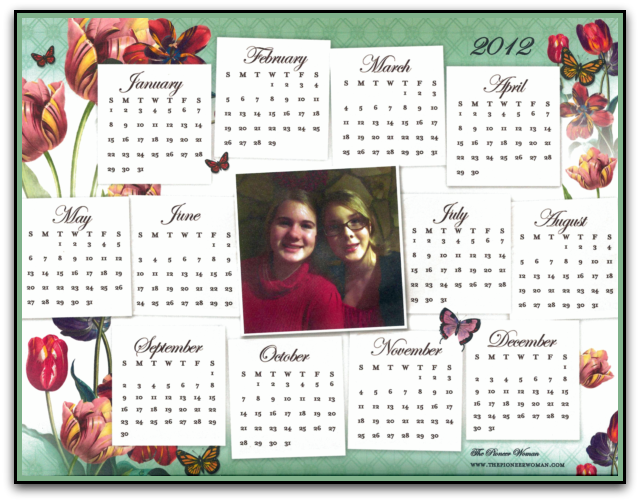 Unfortunately, I forgot to choose the "best" selection on my printer for printing the calendar onto a piece of cardstock, so the photo I uploaded in the center of the calendar, of my daughters, was a bit grainy. Oops! I'll have to remember that for next year. Are you still in need of a free annual or monthly calendar? Here's how to get yours for yourself. Go to HP's Creative Studio website calendar page: http://www.hp.com/hho/hp_create/calendars.html Select a "single page"/annual calendar, or a monthly calendar. You'll notice under the Single Page calendars, you can filter them by "free" and "Use Your Photos". If you do this, you'll find The Pioneer Woman's calendar on the bottom right of the first screen, or here: http://h30393.www3.hp.com/printing/app/us/en/cal_pioneer_woman_year_glance-landing.aspx You'll also find Disney calendars, and other popular themed calendars, although I can't guarantee that all of them are free. 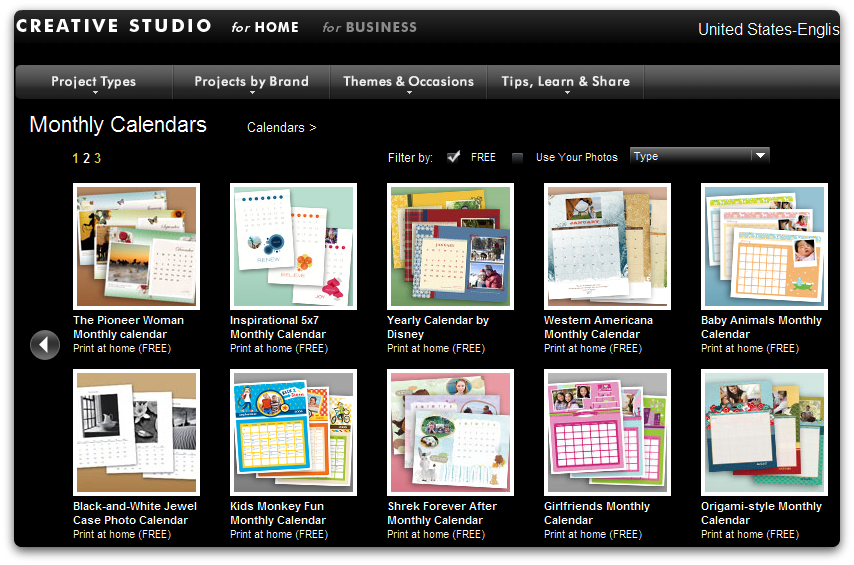 Next, click on the calendar itself, or its description below the small photo of the calendar. There are just a few more simple steps to creating your new, free The Pioneer Woman calendar (or any of their other calendars you may wish to print): 1. Choose the year you'd like to have on your calendar. It guides you through this simple step. 2. Put your own personalized photo onto the calendar! Here's how: Click on "Import Photos." I chose to upload the photo of my daughters from our own computer, so I clicked on the "Computer" selection, although you may also upload photos from Snapfish as their second option. Then, click "Upload More Photos," and "Browse Photos". This will take you to the files on your computer that should have photos you have saved. Select a photo by double-clicking on it. 3. The photo may take a few seconds or a minute to upload to HP's website, depending on the speed of your internet connection. Now, drag the photo over to your calendar, in the photo portion of the page. 4. If you hold your mouse over the photo you've just added to the new calendar, you'll see options to flip the photo, rotate it, or scale the photo larger or smaller depending on your needs. 5. When you've got the photo centered and looking how you'd like it, click on "Preview and Print", option #4. The "Preview and Print" option will then appear at the top right hand side of the screen. Follow the instructions on the screen to print your new calendar!
3 Comments
12/20/2011 06:55:49 am
Thanks for the heads-up! We made calendars today. Then I had the kids color a picture for the back, laminated the two pages back to back, and they will be in the mail as an extra for the grandmas tomorrow. They will love it. 6/24/2012 08:17:09 pm
print media is main part of market and marketing organizations . it is useful to provide information related to the product Leave a Reply. |

Hi! I'm Julieanne!
|


Photos from jaakko.hakulinen, theglobalpanorama, Sarah Korf, jeffreyw, crayonmonkey, Joshua Singh, Sam Howzit, kimberlyac, miggslives, rust.bucket, Derick Leony, Big D2112, Violette79, Andrea.Pacheco, youngthousands, niiicedave, mommyknows, Dominic's pics, sleepyneko, madaise, Daquella manera, Arild Andersen, TounoTouji, jchapiewsky, dennis, cooper.gary, supersum (off), advisorymatters, Nomadic Lass, Effervescing Elephant, ralph and jenny, alubavin, brendan-c, ImNotQuiteJack, jeffreyw, iamlemonfilm, Colin_K, Andrew Michaels, ivoryelephantphotography, bennylin0724, Jo Naylor, daveoratox, f10n4, Bludgeoner86, Ack Ook, BiblioArchives / LibraryArchives, pylbug, limaoscarjuliet, Barbara L. Hanson, CapitalK buy design, Vibragiel, matthiasxc, Podknox, qnr, Sadie_Girl, ComputerHotline, pppspics, Anna Loverus, Joi, Rob.Bertholf, Sheyla Ruiz, nachans, ♥serendipity, IsaacMao, *cart-wheels*, TRFPhotography, vxla, lisaclarke, Missouri History Museum, doortoriver, sunshinecity, anna gutermuth, USCPSC, L. Allen Brewer, bluebirdsandteapots, ell brown, vestman, *PaysImaginaire*, mightyohm, Lars Plougmann, Alex_Lewis116, yoppy, HealthGauge, 401(K) 2013, aprilandrandy, Ben Sutherland, Mason Masteka, WillowGardeners, MStewartPhotography, “Caveman Chuck” Coker, kodomut, DanCentury, TrishaLyn, Katie@!, Looking Glass, Nicholas_T, Francis Storr, Allie_Caulfield, Creative Tools, Aidan Jones, Tim Brown Architecture, HerryLawford, Brett Levin Photography, Gudlyf, Chocolate Reviews, greggoconnell, EmilyWhitwam, Phú Thịnh Co, ilovememphis, cliff1066™, Chi King, erix!, Tony Fischer Photography, GlasgowAmateur, ktylerconk, cfourcalvin, David Locke, blhphotography, dominiqs, quinet, stevendepolo, surlygirl, guzzphoto, mikebaird, rich701, coolmikeol, procsilas, • Happy Batatinha •, pmarkham, Luz Adriana Villa A., LisaW123, fireballsedai, CJS*64, gagilas, Christian Haugen, freddie boy, tausend und eins, fotografik, roland, nedradio, makelessnoise, Salvation Army USA West, TheAlieness GiselaGiardino²³, Arenamontanus, 401(K) 2013, f_mafra, trippingbobcat, brooklyn, Viajar24h.com, yanajenn, jamieanne, hardworkinghippy, ccharmon, eofstr, Julia Manzerova, jhoc, Orin Zebest, battlecreekcvb, jmrodri, trekkyandy, timsnell, Salil Wadhavkar, ewen and donabel, Ted Van Pelt, David Paul Ohmer, Kevin May, CCAC North Library, I_Nneska, AlphaTangoBravo / Adam Baker, dwstucke, Bonnie B., elise.y, Bill Selak, sam_churchill, JD Hancock, olga.palma, cbr_case, acme, alyak, creating in the dark, TrishaLyn, jacilluch, hans s, cwwycoff1, Karen Roe, AlexiUeltzen, surrelmar, Jeff Kubina, rich701, adie reed, pacificbro, dwstucke, rharrison, avlxyz, Jim, the Photographer, Danndalf, storebukkebruse, rodaniel, dicktay2000, exfordy, torres21, Mr. T in DC, avlxyz, andrealindenberg, HarshLight, stevendepolo, publicenergy, Jan Tik, aechempati, ume-y, xfce, Pink Sherbet Photography, nlian, bittle, bradleygee, rs-foto, JamieDrakePhotos, SimonDoggett, slopjop, Norman B. Leventhal Map Center at the BPL, BozDoz, GoRun26, prettyinprint, WTL photos, Minnesota Historical Society, www.bluewaikiki.com, stevendepolo, LibAmanda, jspatchwork, Jinx!, ncmichael2k3, Clevergrrl, michaelkmak, Generationbass.com, Dougtone, roger4336, slgckgc, twicepix, lisatozzi, Lee Nachtigal, Kevin Lawver, brianfuller6385, jamieanne, quinn.anya, SupremeCrete, StockMonkeys.com, OliverN5, jeffreyw, Muffet, krossbow, fdecomite, JeepersMedia, jimmiehomeschoolmom, Zanastardust, joyosity, frotzed2, szapucki, Vincent van der Pas, normalityrelief, Emily Carlin, Clevergrrl, allyrose18, sleepyneko, Jeff Kubina, efleming, Artman1122, notjustsquirrels, PhotoAtelier, roolrool, onnola, Charles Williams, greggoconnell, Highway Patrol Images, andrechinn, loop_oh, ayustety, toinerooijmans, vmiramontes, Claricethebakergardener, mind on fire, jimmiehomeschoolmom, Kat Johnston / Sanura Sakai, toinerooijmans, rfduck, stu_spivack, OmegaPoint, ingridtaylar, AdamSelwood, Gog Llundain, pbody
