I have found that if I spend Sunday afternoon planning meals for the next week and plan our homeschooling curriculum as well, plus make all of my "to do" lists, etc., I have spent probably 4 or more hours trying to stay organized. Fortunately, only two academic subjects need to be planned anymore, but they are the two subjects that take a lot more time for me to plan. If my husband and children want to go visit someone on Sunday afternoon, or they want to go hiking or fishing or picnicking, I find that I need to give up the planning time. My family comes first! Have I ever mentioned that I'm not real "quick" when it comes to things like this, the planning and the organizing? Just about the only thing I do quickly is to type. Yup. That's about it. I love organizing and planning, but I have found over the years that if there is any noise in the house, I have a hard time focusing and concentrating. Combining this auditory processing difficulty with loving interruptions from my children makes it tough for me to do planning when the girls are awake, even though they are mature enough to kindly leave me alone if necessary. After they go to bed, I am often too tired to begin doing planning. So, I find that I scrape by on the seat of my pants most of the time. Anyway, after several years of agonizing at 5:00 p.m. each evening about what we are going to eat as a family, I finally decided to give e-Mealz.com a try. Here are my first impressions. There are other meal planning sites out there on the internet, but e-Mealz.com is unique in one major aspect: they combine meal planning with the actual sale ads from the grocery stores. That way, families are able to enjoy a variety of meals planned purposefully for them to save a considerable amount of money. I like this! One thing I did notice on their website is that their grocery store plans (Kroger, Publix, SuperWalMart, ALDI's, and Ralph's) are not found in my area at all. Kroger, Publix, and ALDI's are east coast/southern U.S. grocery stores (from the little I know about them), and Ralph's is a California chain of grocery stores owned by Kroger. Most areas have SuperWalMart stores, but our location does not...only a regular, smaller WalMart. I rarely shop there, anyway. However, e-Mealz.com also has an "Any-Store" plan as well. The sales will be more seasonal in nature, and the savings won't be as much as if you had a specific plan to go with a specific store, but you will still find yourself saving money using their meal planner, especially since you won't be stopping on the way home in the evening to pick up food from a restaurant! Our local Fred Meyer store is owned by Kroger. Just because I was curious, I downloaded the grocery store sale ad from the Kroger grocery store website and compared it with the Fred Meyer sale ad in our local newspaper. There were some similarities in the ad prices, but a lot of differences. I thought it was interesting to see "catfish and fries" advertised with Kroger's family meal deal, while here in my state, you would never see catfish and fries advertised. It would be...fried chicken and spuds! I went ahead and chose the Kroger meal plan to use with my family. Even though about three-fourths of the sale items on Fred Meyer's sale ad were different than the Kroger ad and meal plan, I decided to give it a try. While grocery shopping this evening, I found that three-fourths of the items I purchased at Fred Meyer were either the same price or below the Kroger ad price. About one-fourth of the grocery items were priced slightly higher than the Kroger ad price. Amazingly, some of our more local, organic produce was priced similarly to Kroger's regular prices for regular, non-organic produce. Here is the first week's meal plan that I chose:
Here are some of the changes I made to the recipes: Stir-Fried Chicken Fajitas with tortilla chips and salsa: I'm using uncooked tortillas from Costco instead of regular tortillas. Yes, I'll cook them first! Instead of making my own salsa this time, I'll use our favorite pico de gallo. Garlic Tilapia Over Pasta, with steamed broccoli: I will be using whole wheat pasta, even though the recipe didn't call for this. BBQ Chicken with Baked Potatoes and Ranch Beans: BBQ chicken isn't our family's favorite, so I'll make Lemon-Pepper Chicken instead. I don't know what Ranch Beans are. I'm thinking this is another title for pork and beans. Anyone know? I think we'll just cook our chicken on the grill for this night. Bacon Penne Alfredo with Garden Salad and Garlic Italian Bread: I found some nitrite-free, hormone-free bacon tonight at Fred Meyer! We only buy bacon about 3-4 times a year, so this will be a treat. We decided to do away with the Italian bread and just enjoy an extra veggie dish using up our vegetables from this week's CSA produce box. Spinach Cheese Calzones with Corn on the Cob and a Hearty Salad: Instead of buying refrigerated pizza crust, we'll be making our own. I have a quick and easy recipe that we'll use. (Thanks, Janet!) Footlong BLT with Potato Salad and Sliced Fruit: We decided to eat macaroni salad because it is easier to make and less expensive to buy pre-made, if a person chooses to do that. We'll just use a combination of fruits we have on hand to go along with our meal. E-Mealz.com not only provides choices for specific grocery stores, it also provides options for different types of diets:
I cannot even begin to tell you how I felt when I unloaded and put away those groceries and realized that except for a gallon of milk or two this week, I wouldn't be needing to run to the grocery store at the last minute for an ingredient I still needed! I will be even more excited to have dinner ready by 5:30 p.m. each evening, without having to rack my brain and try to come up with a recipe where I have all of the ingredients and it suits the hot weather. I look forward to providing you with an update each week as to how the previous week's menu planning went, and what we thought of the meals and recipes that were provided. I think that this will be fun! UPDATE ~ April 2013: We have used eMealz several different periods of time over the last several years. As of 2013, there are a ton of additional options from which to choose! There are more store options, more dietary options, there's just a lot more! We finally decided not to continue using eMealz mainly because we liked being able to have the flexibility to use our own family recipes that we love, as well as recipes from Trim Healthy Mama, which has helped our family lose a ton of weight with interesting, fun, and new recipes. But eMealz.com is still a wonderful option for a lot of families! I was provided with a three-month free subscription to eMealz.com in order to write this honest review for you, my readers. No other compensation was provided.
18 Comments
|
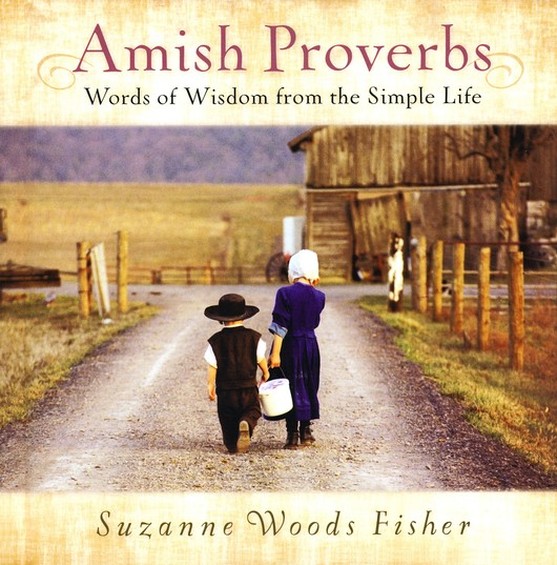
| There were quite a few quotes of wisdom as I read Amish Proverbs that I found convicting and encouraging. Here are a few of them:
|
Not only did I enjoy reading this book for pleasure and inspiration, I would like to include it in our family Bible devotional times together. Now that the girls are 10 and 12 and more interested in deeper Bible studies, I'd like to use Amish Proverbs to help us look up Scriptures that go along with individual quotes of wisdom. I think that this would be a great resource to use along with studying the Bible.
The quotes provided in Amish Proverbs would also be excellent for copywork, for all of you homeschooling families out there. Maybe some day, in my spare time (ha!), I can develop a set of copywork pages to go along with this book.
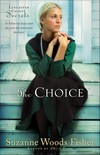
| Suzanne Woods Fisher is the CBA bestselling author of The Choice, The Waiting, Amish Peace, and Amish Proverbs. Her interest in the Anabaptist cultures can be directly traced to her grandfather, W. D. Benedict, who was raised in the Old Order German Baptist Brethren Church in Franklin County, Pennsylvania. Benedict eventually became publisher of Christianity Today magazine. Suzanne is the host of a radio show called Amish Wisdom and her work has appeared in many magazines. |
Here are some other books written by Susanne Woods Fisher:
What do you get when you combine politics, the beginning of the Civil War, the Shaker religion, a romance, and a family torn apart?
This is The Seeker, a historical fiction account of one of the Shaker communities in the state of Kentucky. This book opens with the hints and rumors of war - Civil War - between states, countrymen, and brothers.
I've seen Shaker furniture before. I've always noticed the simplicity and beauty found in the lines and lack of decoration in Shaker furniture.
I must admit, however, that I didn't know anything about the Shaker people. I had no idea that they were a religious group in the 1700s and 1800s.
I enjoy learning new things while reading historical fiction, so this book drew me in with its rich details about Shaker life and communal living. I didn't realize that the Shakers were an offshoot from the Quakers; the Shakers were aptly called by this name because they would often shake and tremor during church services.
I found the plot to be a bit predictable at times, but the story wasn't bogged down with incredibly lengthy explanation or rambling dialogue.
I never studied much about the Civil War in school, so I enjoyed reading a bit more about our United States history.
This is Mrs. Gabhart's third book about the Shakers, so if you read and enjoy this, you may want to try her other two Shaker books:
I had a little bit of trouble teaching my girls how to hold a pencil properly, but it wasn't too painful. In our spelling/reading/writing curriculum when they were beginning readers (Spell to Write and Read), there was an instructional paragraph and a diagram of how to help children learn how to hold the pencil correctly, and I found that helpful.
It's not that a child can't write well with an improper pencil grip...it's just that the likelihood of that child not enjoying writing is much higher. Their fingers, hands, and wrists easily get tired and cause them to not want to practice handwriting skills or to write lengthier paragraphs.
Also, when a child has a confident and comfortable pencil grip, he or she will generally have the tendency to write neater than if he or she did not.
I can't promise that my children have a "perfect" pencil grip. It's not exactly like it you'll see it in the videos below. But it's pretty close!
Kelsi also had a visual tracking disorder, which made writing a bit more difficult for her. I have the same visual problem. While it took Kelsi and I a tad bit longer to learn how to blend letters and phonograms together using an excellent reading program, we did catch on. (I was taught to read using a very similar method when I was a child.) Fortunately, her tracking disorder was not severe enough to require vision therapy.
When she started the first grade at home, I began using an old-fashioned technique that I had heard from a lot of people in their 60s, 70s, 80s, and 90s:
Teach cursive first.
What? Are you crazy?
I know that some Americans in that era did learn to print first, however. Some of them probably grew up in the more "progressive" states like California and New York, which were some of the first states to experiment with "newfangled" ideas in education.
From what I've been able to learn, though, many people around the world were taught to write using cursive handwriting first.
Since the author of the reading/spelling/writing program we used (Mrs. Wanda Sanseri) also recommended to me in one of her classes that we teach our children cursive before manuscript, I decided to give it a try.
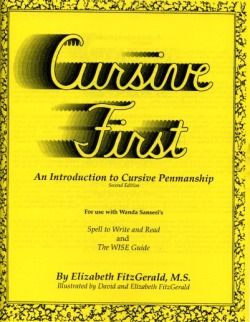
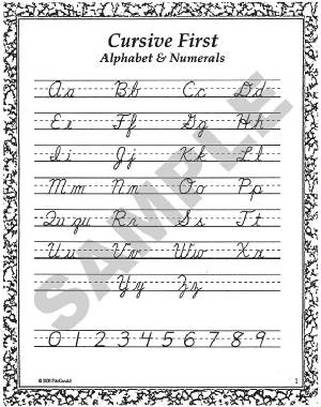
| Elizabeth FitsGerald, who teaches classes on Spell to Write and Read, designed a handwriting program that teaches cursive handwriting - first. I hesitatingly began using Cursive First to teach Kelsi cursive handwriting. It made me nervous. How was she going to be able to make loops and tails if she struggled to write small, straight lines? |
Three months later, her cursive handwriting was as nice as a junior high student who had neat cursive writing.
One year later, her cursive handwriting was as beautiful as an adult who wrote neatly in cursive!
After a couple of years using cursive handwriting, Kelsi wanted to begin learning printing. This time, her fine motor skills were ready!
I find it interesting that Kelsi really enjoys most fine motor activities now, and she does them well. In fact, fine motor skills are her strength. She enjoys playing the violin and piano, hand sewing, cross stitching and embroidery, keyboarding, drawing, and painting.
All from a child who, at the age of 6, could barely hang onto a pencil.
If your child, no matter what age, is struggling with holding a pencil correctly, I would suggest that you consider focusing on this and correcting it.
It may be painful; it may not be pretty. But I do think it is important to at least make this a big priority in your child's life.
If I had been able to watch these videos when my girls were young, I would have had more confidence in explaining the pencil grip in a way that made sense to them.
If you have older children, the preschool videos obviously may not be appropriate. But the first one will!
I hope you will find these useful for your own children or grandchildren, or perhaps a child in your neighborhood or at your church.
This excellent video will demonstrate how you, as a parent or teacher, can make a quick, inexpensive pencil grip that will really work well for most children:
The TOS Schoolhouse Planners
your children at home,
what do you have on your plate?
The Old Schoolhouse has developed an amazing guide to serve you with blessings...organization...and joy!
Here is a taste of what the
TOS Schoolhouse Planners have to serve:
|
|
|
All E-Books published by The Old Schoolhouse® Magazine come with a 7-day, 100% money-back guarantee.
Disclosure: As a member of the TOS Homeschool Crew, I wrote this blog post while participating in the "The Old Schoolhouse" advertising campaign for the Schoolhouse Planner, making me eligible to possibly win a prize. I received a free copy of the planner to facilitate the writing of this blog post. I have received no other compensation from it, and all opinions and experiences within this advertisement are my own.
I draw about as well as a four-year-old. I have never developed an "artist's eye" for perspective, shading, and highlighting.
Plus, a few other important details, but we won't go into all of that.
I'm artistic in other ways, like in selecting colors that go together well. I even took decorative painting classes for a few years before my children were born, and I was able to paint some beautiful pieces...but I traced on the pattern, and I had an instructor who was very gifted in showing us the tips and tricks on how to use paintbrushes for their intended purposes.
But drawing? Sigh. I'm hopeless.
My girls, however, enjoy drawing - a lot. I finally bought them each a bound drawing book (9" x 11") so they could keep their multitude of drawings there. It's been fun to flip back through their drawing books and see their progress.
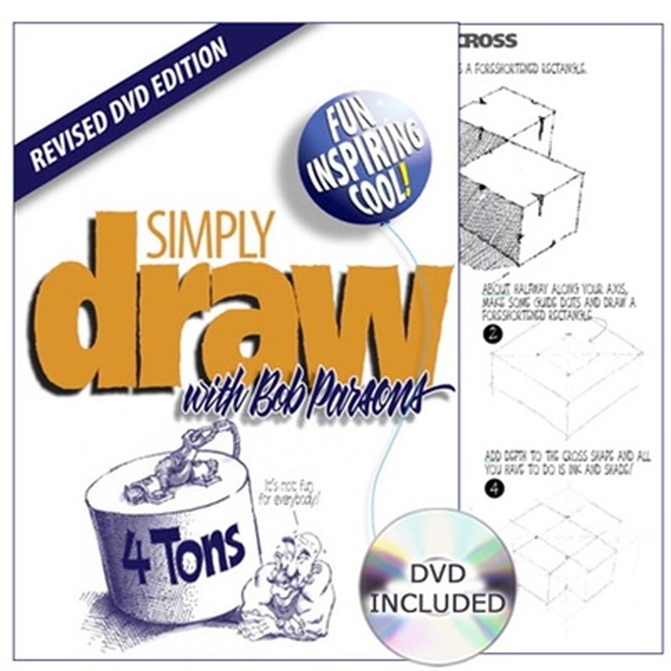
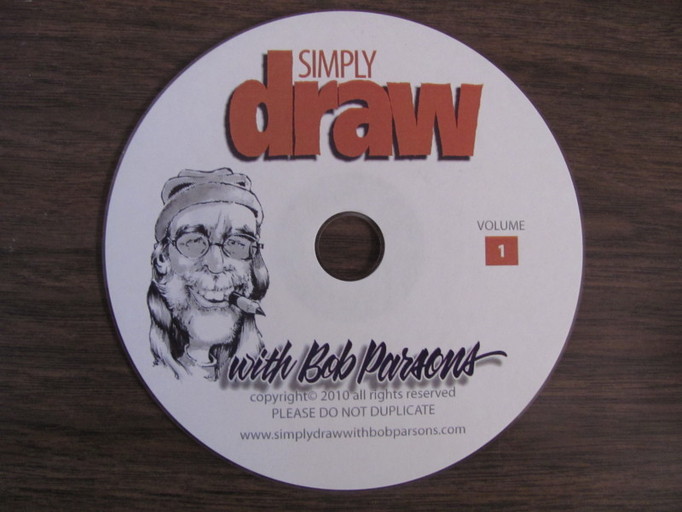
Simply Draw...with Bob Parsons includes:
- 200-page unbound book, 3-hole punched, ready for a 3-ring binder
- DVD-ROM containing almost three hours of instruction
- PDF files containing all of the printable practice pages from the unbound book, so I can use these with more than one child in my family at a time.
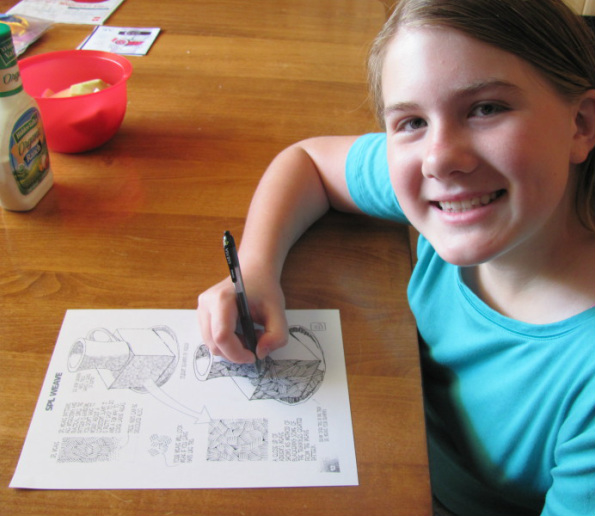
When I mentioned that we were going to work through some of the lessons from Simply Draw...with Bob Parsons, one of the girls began reading through the book on her own, ahead of time. She hadn't got out any art supplies, but she had read through half of the book before we sat down to begin working on a lesson!
The enclosed DVD contained video clips which were showing Mr. Parsons demonstrating how to do the various techniques. The videos that we watched were short, to the point and easy to understand. The quality of the video was not as good as I've seen in some curricula, but it was acceptable. There were a few skips in the audio, like a syllable or word missing a couple of times, but the videos were clear enough to demonstrate the techniques.
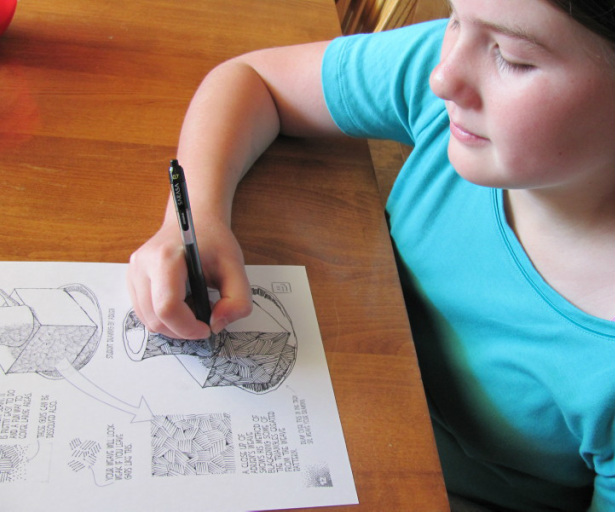
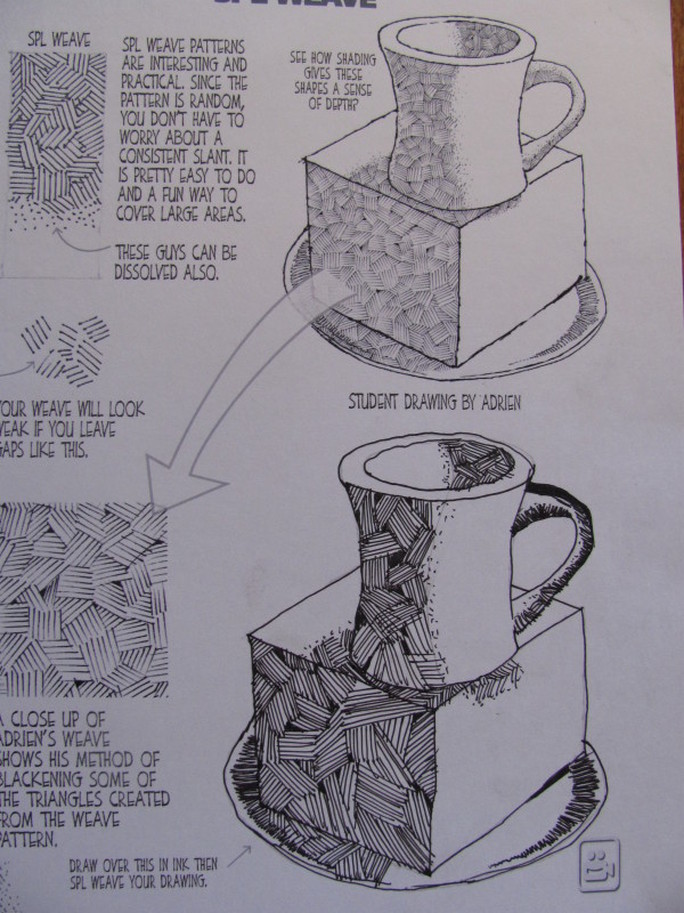
About an hour after she completed the page above, she walked through the schoolroom and glanced at her drawing again.
"Hey, Mom! Now I actually think that my drawing looks pretty good!"
I agreed. The girls decided that this was an drawing curriculum that they could enjoy using. Maybe they wouldn't be cartoonists or draw in exactly Mr. Parsons' style of drawing, but they figured out that the techniques in Simply Draw are those that can be applied in many types of drawing in the future.
Instead of printing off the reproducible pages with normal photocopy paper, I chose to use cardstock like the pages in the Simply Draw curriculum.
You will need your own 3-ring binder for this curriculum, and a few basic drawing supplies, but it is a relatively inexpensive drawing curriculum.
I was impressed with its ease of use, the ability to use it with all of the children in your family, the inclusion of the video demonstrations, and the quality of the cardstock used to print the actual curriculum - something that is rare to find in my experiences with a variety of curricula.
I recommend Simply Draw with Bob Parsons for these reasons, and if you have been looking for a drawing curriculum for your children, this is one that takes little to no parent preparation...in fact, your children can work through this independently and be fine!
You can find Simply Draw with Bob Parsons here.
Timberdoodle not only carries excellent curricula, but they also carry a wide selection of toys, games, models, and art supplies. We have purchased several Color Combi Pencil Sharpeners over the years (a MUST if your children use and need to sharpen high quality colored pencils).
Timberdoodle's art supplies are great, as well. You can find those HERE.
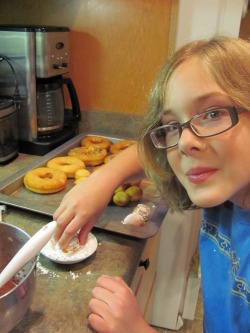
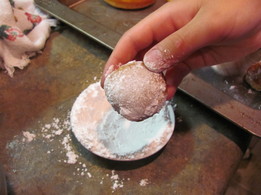
| Our family doesn't really eat doughnuts anymore, since we are eating with a low-carb lifestyle plan right now...but my girls had never made homemade doughnuts at home with me a couple of years ago, and they wanted to give it a try! I always enjoyed watching my mom make homemade doughnuts when I was a child. I don't remember helping make them, but several times each year, she would whip up some yeast dough, let it rise, cut out the doughnuts or maple bars, and then fry them in hot oil. Here's my daughter, Brittany, rolling a doughnut hole in powdered sugar. She was excited! |
We didn't eat fried foods hardly at all when I was growing up. We only ate out at restaurants a couple of times each year, and we didn't buy processed foods from the grocery store very often. First, there just weren't as many processed foods back then in the 1970s and early 80s, and second, they were a lot more expensive than preparing foods at home.
I would say that we probably only ate fried foods (including cod or halibut fillets) about once every 2-3 months. I don't think that is overdoing it, especially when you compare that to the rate that the average American eats fried foods these days.
One thing I do remember being afraid of a bit, when we made fried foods, was trying to keep the temperature of the oil just right: not too hot and not too cool. Too cool, and the food would absorb too much oil and be very greasy and unhealthy. Too hot, and we would risk a house fire!
Yesterday, when Kelsi called me on my cell phone while I was at the grocery store, and asked me if she could start making raised doughnuts, I said yes...but I wandered over into the food appliances aisle of Fred Meyer and took a look at the Fry Daddy Plus that they had in stock.
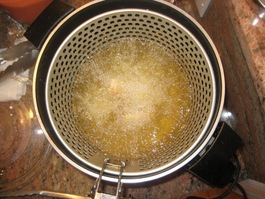
| | I read through the instruction booklet, and I was impressed that I wouldn't have to regulate the heat of the oil AT ALL. Not one bit! That appealed to me. No real danger, when used properly, of a house fire or flares, unless we added wet foods that contained too much water. I also liked the fact that it only uses four cups of oil for whatever is being fried. |
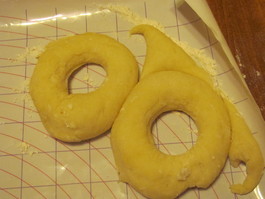
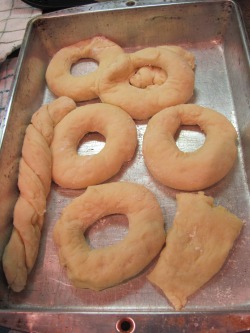
| Kelsi made the dough while I was working in the schoolroom on some other things. I can say that at age 12, she is really a capable baker now! She let the dough rise in the warm oven for an hour. It was such a warm day that it didn't require the normal two hours of rising time. Then, she began to cut out doughnuts and maple bars while the oil heated in the Fry Daddy. |
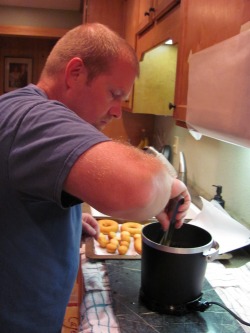
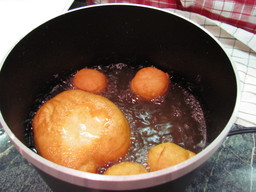
| My husband, Elmer, began frying doughnuts and maple bars in the Fry Daddy. We usually did only 1-2 doughnuts at a time so that the temperature of the oil wouldn't cool down and so the doughnuts would fry evenly. |
| The girls wanted to add some sprinkles to a few of the doughnuts. We let them! The doughnuts were so delicious when they had cooled down and were glazed. The recipe I used was from my mom from years back, and it isn't overly sweet. It contains mashed potatoes, which helps make the doughnuts fluffy and substantial at the same time. |
If you are looking for a very sweet doughnut, you may want to find a different recipe. The thin glaze provides just enough sweetness for our family without being sickeningly sweet.
Maple Bars and Doughnuts:
- 2 cups scalded milk (heat almost until boiling)
- 1/2 cup sugar
- 1/2 cup shortening or coconut oil (in solid form)
- 1-1/2 tsp. salt
- 1 cup mashed potatoes
- 2 Tbsp. or 1 package dry yeast dissolved in 1/4 cup warm water
- 7-9 cups of flour
- 2 eggs
Mix together scalded milk, sugar, and shortening or solid coconut oil. Let cool to 115 degrees. Add salt, eggs, mashed potatoes (instant, fresh, or leftover), and yeast dissolved in liquid. Mix well. Begin adding flour, one cup at a time, adding just enough so that the dough can be handled without being overly sticky.
Knead dough for several minutes until smooth and elastic. Place dough in a lightly greased bowl and turn greased side of dough facing up. Cover. Let rise in warm place until doubled, about two hours. (I turn my oven to "warm" for a couple of minutes and then turn off the heat. That seems to work well even in the winter.)
Roll out doubled dough to about 1/2" thick on a floured surface. Cut out maple bar and doughnut shapes. Heat cooking oil several inches deep in deep pan on stovetop until oil reaches 375 degrees. (Or, heat FryDaddy, etc. for 10-15 minutes. See instruction booklet for more information.)
Fry bars or doughnuts for several minutes on each side until golden brown. Carefully remove doughnuts from hot oil. Drain on paper towels on plates or cookie sheet. (I used a section of the newspaper on the bottom and then covered it with one layer of paper towels to be more frugal.)
Serve plain, sugared, or frosted.
Maple Frosting:
- 3 cups powdered sugar
- 1/3 to 1/2 cup soft butter
- 1/2 tsp. maple flavoring or 3 Tbsp. real maple syrup
- 2-3 Tbsp. milk (reduce if using real maple syrup)
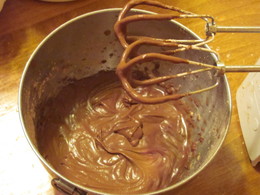
Chocolate Frosting:
- 3 cups powdered sugar
- 1/3 to 1/2 cup soft butter
- 1/3 cup unsweetened cocoa or 2 squares melted baking chocolate
- 1 tsp. vanilla
- 2-3 Tbsp. milk
Basic Glaze:
- 1/3 cup boiling water
- 1 cup powdered sugar
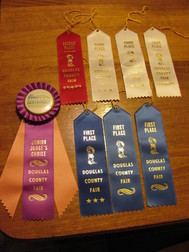
| When our oldest daughter was five, we decided to encourage her to begin entering something in the county fair each year. While we didn't expect her to win a ribbon for the baked good that she made that year, we hoped that she would begin to get excited and motivated to learn new skills like cooking, baking, crafts, and sewing by entering items into the fair each year. Now that both of our daughters have been entering items into the county fair for six to seven years, we've learned some things about fair exhibits, our family, and why this is important for us to do. |
As a mom, I've learned that entering items into the county fair is a great motivator to help children hone their skills and develop interests. One of my daughters loves learning things just for the sake of learning. The other daughter is more of an entrepreneur, so she enjoys entering things into the fair to earn a little bit of money...and to receive verbal praise from others.
Whatever their motivation may be, I have found that when they are practicing baking something or arranging flowers or working on a sewing project, since they know it will be entered into the fair later, they are more dedicated and focused on "getting it right."
This is a great thing!
This year, Brittany made a lengthy, time-intensive baked good for the fair. She had to concentrate and focus...and she did well! I was impressed to see her thinking through each step and planning so that she could save time and eliminate extra work. She rarely had to come ask me questions. She is improving and gaining confidence in her baking skills!
Kelsi made three different baked goods. I didn't need to give her advice at all. She can bake anything and everything now; I'm pretty confident at that. I can now even trust her to bake at home while I'm away. She's that careful! I wouldn't let her fry things in hot oil while I'm away from home, but just about everything else, she does well.
Here are 12 basic tips for helping your child enter
food items into the county fair:
| 1. Always, always exactly follow what the fair guidelines state for each specific contest. If they say to bring 6 uniformly shaped cookies, bring six...and make certain that they are as identical in size as you can. Also, have your child make sure that they aren't huge cookies. The judges prefer 2 to 2-1/2" sized cookies. Anything larger should be entered into the Monster Cookies section, or else it will probably be marked down for its large size. |
3. Have your child bake the baked goods the same day they are to be turned in, or the night before, although the same day is better. They will taste fresher and look better. I do know a lady who enters many baked goods into the fair on one day, by placing items into the freezer as she bakes during the summer, and she does pretty well with that, but I still recommend that they be baked the same day, if possible.
4. Try to be unique in the recipes you choose. We have found that the most cookie entries are found for chocolate chip cookies, peanut butter cookies, and other popular cookies. Try gingersnap cookies or something unique and unusual. You'll have a better chance at a blue ribbon, instead of your chocolate chip cookies sitting on exhibit with 149 other chocolate chip cookie entries.
5. Have your child practice the recipe at least once before making the final fair exhibit entry. When our girls were younger, we would have them practice their baked good entries 3-4 times over the summer, before the county fair. Now that they are a little older, we have found that they usually only need to practice the recipes one time unless there is a problem.
6. Remind your child not to underbake the baked item. While the average American prefers ooey-gooey chocolate chip cookies, the fair judges won't.
Seriously.
If you have a judge who kindly writes comments on the back of the entry form, he or she will usually tell you that the item could have baked a little bit longer.
While this could be annoying, the judges are going by standard baking practices that have been in place for decades, so don't despair...just bake it a little bit longer than you might usually do for your own family!
7. Don't wait until the last fifteen minutes of the exhibit day to bring your child's baked item down to the fairgrounds. You may find yourself standing in a long line, or feeling frazzled because you rushed to get to the fair in time to turn in the baked item or craft. Give yourself extra time so you won't feel rushed.
8. Don't have your child enter any baked item that includes mixes, unless allowed by the rules. That means, no cake mixes, muffin mixes, commercial bread dough, etc. Sometimes, dry pudding is allowed in the baked item. You will want to check with your county fair leaders to see if they will allow minor ingredients like pudding, etc. to be added. If at all possible, make everything from scratch.
| 9. Help your children out by doing the dishes for them. From their perspective, their efforts at baking something new as an inexperienced baker AND cleaning up the kitchen afterward could be compared to us making the entire Thanksgiving dinner alone and then cleaning it all up by ourselves. That is a BIG job...and I am helping my children not become totally discouraged and exhausted. They regularly do dishes after dinner, so they know how to do dishes well. But when they are baking something for the fair, I occasionally step into the kitchen and begin washing dishes and wiping countertops...just to be helpful. They notice this and appreciate it! (Who wouldn't!) | |
11. Begin to teach your children about being an honorable winner and an honorable loser. Explain how to react and behave when they have found out that they've won "Judge's Choice" or they don't win any ribbons at all. Both are necessary in life. We all need to learn how to be good winners and losers.
| 12. Realize that it will probably cost you more money for recipe ingredients or craft supplies than they will probably earn in ribbon prizes and money awards at the county fair. At our county fair, blue ribbons earn $4 or $3; red ribbons earn $3 or $2; white ribbons earn $2 or $1. That's not a lot of money when the ingredients for some recipes cost more than $3 and your child has practiced it three times already before making the final entry for the county fair. |
That's okay! The whole point, for me as a parent, is to show them the love for cooking, baking, photography, sewing, and crafts. I don't mind if I personally come out in the red on the financial end of things...not when it comes to fair entries.
The joy of watching the smiles on their faces, seeing their confidence grow year after year, and knowing that their skills they are learning will be with them the rest of their lives...that is priceless.
Our children have learned a lot by entering items into the fair. If you have been wanting to do this with your children, but find yourself discouraged each summer with them entering nothing into the county fair, I would recommend starting out small.
During this coming school year, help your child pick out one recipe or craft idea that they might be interested in entering into next year's county fair. By starting out with one item or entry, you won't set yourself up for failure like you have in the past. Have your child bake that item once a month, trying out variations of different recipes if needed. Or, have your child spend a few minutes each week or a couple of hours each month working on that craft project or hobby.
It will pay off! You will find your child's confidence growing, and his excitement growing!
What have you done to help your children enjoy learning new tasks?
Have your children entered items into the county fair? If so, what tips can you share with us?
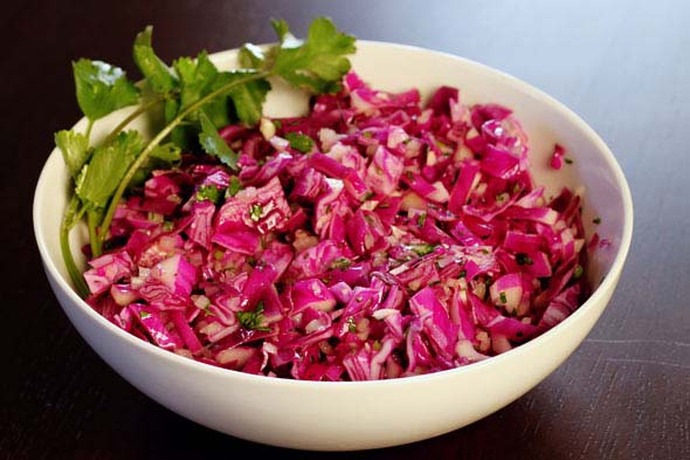
Red Cabbage Coleslaw (Makes 8 servings)
- 1 head red cabbage (or green or purple)
- 1/2 cup red wine vinegar
- 1 Tbsp. sugar
- salt and pepper, to taste
- 3 Tbsp. olive oil
- 2 Tbsp. poppy seeds (optional)
Half and quarter the head of cabbage and remove the core. Shred the cabbage finely with a knife. Place shredded cabbage in a large bowl.
In a separate, smaller bowl, combine vinegar and sugar. Stir until sugar is dissolved. Season with salt and pepper to taste.
Whisking continuously, slowly add olive oil to dressing mixture. Pour the vinaigrette dressing over the shredded cabbage. Toss to combine. Keep salad at room temperature for one to two hours, covered loosely, stirring or tossing occasionally. Prior to serving, sprinkle salad with poppy seeds, if desired. Refrigerate leftovers for up to 3 days.
I must admit, this has never, ever crossed my mind.
Someone, although I won't say who, used up the last of my lemon juice this week. Thankfully, Elmer and the girls were already at the store, so I just gave them a call and had them grab some lemon juice to bring home.
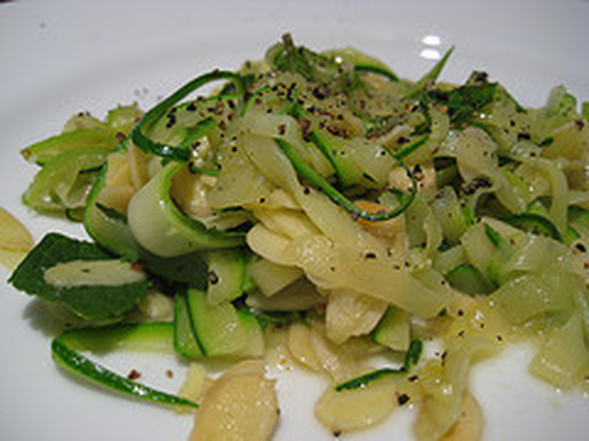
Surprisingly, we all enjoyed this zucchini-chicken sandwich filling. We couldn't even tell it had any zucchini in it! Bonus!!!
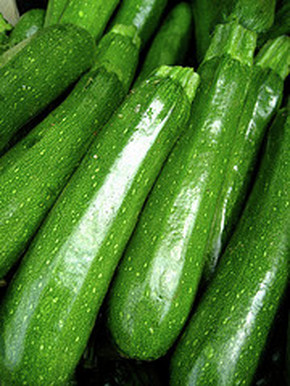
Marinated Zucchini and Chicken Sandwiches Makes 4 servings.
- 1 medium zucchini
- 1/4 of a red onion, thinly sliced
- 1 Tbsp. thinly sliced lemon zest, optional, or lemon pepper
- 2 Tbsp. fresh lemon juice
- 2 Tbsp. olive oil
- salt and pepper
- 1 pound chicken breast or cutlets, or 2 cups leftover chicken
- 1/2 cup chopped toasted almonds
- 1/4 cup chopped fresh parsley, optional
- 1 loaf Italian bread, or Italian sub rolls
Using a vegetable peeler, slice the zucchini into thin ribbons.
Combine peeled zucchini with sliced onion, lemon zest or 1 Tbsp. lemon pepper, 2 Tbsp. olive oil, and 2 Tbsp. lemon juice. Sprinkle with salt and pepper to taste; let stand in bowl on counter for 30 minutes.
Meanwhile, sprinkle chicken with salt and pepper to taste and broil until fully cooked (no pink), or cook using frying pan or microwave.
Shred cooked chicken with two forks, or use food chopper to chop into small pieces. Add cooked shredded or chopped chicken to marinated zucchini. Stir in chopped almonds and fresh parsley, if desired.
EnJOY!
Hi! I'm Julieanne!
You'll find me in the kitchen
trying new Trim Healthy Mama recipes, loving God, and carrying out that love as I bless my husband and teen daughters.
Find
Joy In Our Journey on:
Joy In Our Journey's
latest blog posts, freebies, and more!

Search
Joy In Our Journey
Archives
December 2016
August 2015
July 2015
March 2015
February 2015
January 2015
December 2014
November 2014
October 2014
September 2014
August 2014
July 2014
June 2014
May 2014
April 2014
March 2014
February 2014
January 2014
December 2013
November 2013
October 2013
September 2013
August 2013
July 2013
June 2013
May 2013
April 2013
March 2013
February 2013
January 2013
December 2012
November 2012
October 2012
September 2012
August 2012
July 2012
June 2012
May 2012
April 2012
March 2012
February 2012
January 2012
December 2011
November 2011
October 2011
September 2011
August 2011
July 2011
June 2011
May 2011
April 2011
March 2011
February 2011
January 2011
December 2010
November 2010
October 2010
September 2010
August 2010
July 2010
June 2010
May 2010

