|
| A few years ago, my family needed to make a big change in the kinds of soaps we used. You can read about why we left commercial soaps behind. It was one of the first attempts our family made toward more natural beauty and health products - and it was a huge success! It only took about 3 days for my daughter's hands to transform from very red, dry, itchy hands to normal, smooth hands. It was an amazing transformation, and we all noticed a big difference in how our hands felt in the middle of the winter! |
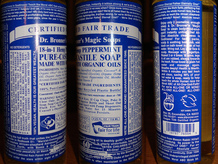
| The problem is that the price of the oils used to make healthy natural soap has risen significantly over the last year. The price of Dr. Bronner's Magic Liquid Castile Soap went from $10 per quart to $16 or more for the same amount of soap, all within about one year! And Dr. Bronner's bar soap went from $3.75 per bar to over $5 per bar, in the same length of time. Even though this soap is quite concentrated, that's just too expensive for us. |
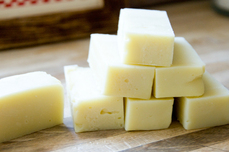
| After doing quite a lot of research on the internet this summer, I decided to try to make my own soap. I cheated, though. I'll admit it - I went to a friend's house, and she taught the girls and I how to make our own bars of soap! (Thanks, Serena!) We made our soap with goat's milk, olive oil, coconut oil, and palm oil, I think. |
Strange, isn't it? You think you're using soap for your hands and in the shower, but you're actually using detergent. No wonder our skin reacts in such a negative way to so much of the soap on the market these days!
Guess what? I learned that you can turn BAR SOAP into liquid soap!
| It’s easy to convert bars of soap to liquid hand soap. All you'll need to do is to melt the grated soap in water, add some glycerin to the mixture, and wait a bit to get the consistency how you'd like it! If it's too thin, I'll help you figure out how to thicken it, and if it's too thick, I'll show you how to water it down. I found that one bar of soap made three-fourths of a gallon of liquid soap...and are you ready for this? For under a dollar! Plus, the liquid soap is so concentrated that in most cases, you'll have to dilute it with water. Amazing! |
1. If your skin needs a more natural soap, you'll want to look for a higher quality soap - not detergent. It will need to have gone through the saponification process. Detergent soaps are made from synthetic chemicals produced in a lab, usually from petroleum products. Non-detergent soaps are made from naturally-occurring ingredients such as water, animal fats, vegetable fats, lye, and sometimes, glycerin, although normally glycerin is a natural by-product of bar soap if it has been made and cooled correctly. Just look at the labels, and you'll see what not to buy if you have sensitive skin. I've heard that Kirk’s Castile Soap works well with these directions, but I haven't tried it yet.
Here's a list of ingredients found in Lever 2000 bar soap:
- Stearic acid
- Tetrasodium EDTA
- 2,6-Di-t-butyl-p-cresol (BHT)
- Sodium isethionate
- Trisodium etidronate
- Triclosan
- Disodium phosphate
- Sodium chloride
- Water
- Sodium tallowate
- Titanium dioxide
- Coconut fatty acids
- Sodium cocoate
- Sodium cocoyl isethionate
You'll want to avoid soaps like Irish Spring, Palmolive, Dove, Ivory, etc. if you need something that will be a lot easier on your skin.
If you prefer to use Dove soap, you will need an entirely different recipe, found here: http://www.savvyhousekeeping.com/turn-a-bar-of-dove-soap-into-liquid-hand-soap/
2. If your skin isn't sensitive, and you just want to save money on purchasing liquid soap, you have more freedom to use a variety of soaps on the market. Avoid Dial or any soap that has a "softer" feel to it. Choose soaps that have a harder feel to them. Look at the list of ingredients on the label and don't purchase any soap that contains citric acid.
3. The price of the bar soap doesn't determine its quality. Yardley of London soaps ($1 at Dollar Tree and inexpensive at other stores) will work really well for this tutorial, if your skin can handle that type of soap. But you can also use homemade soaps that are more natural.
4. Don't expect this liquid soap to behave exactly like liquid soap from the stores. If you do, you will probably be disappointed. If you are willing to be flexible, you should be pretty happy with this soap. It may not lather up in the same way that commercial liquid soap does, where chemicals have often been added to make the soap extra "bubbly".
Ingredients:
- 1 cup of soap flakes (grated from a bar of soap of your choice)
- 10 cups water
- 1 Tbsp. glycerin
- optional: a few drops of essential oil per smaller soap bottle once it is finished, if your skin can tolerate it
Tools You'll Need:
- food processor or cheese grater
- Dutch oven or stockpot (I used a 6-qt. size)
- measuring cup; measuring spoons
- wooden, metal, or heat-resistant spoon for stirring
- soap container with a hand pump
- jar or container to hold excess soap
- funnel (helpful but not required)
Let's make homemade liquid soap!
First, grate up one bar of soap. There are several methods of doing this:
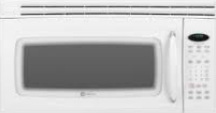
| The first method I tried, in order to help grate the bar of soap with ease, was to microwave the bar of soap for 10 seconds or so. I saw numerous websites that suggested this method. Actually, some of the websites said to heat the bar of soap in a glass bowl in the microwave for several minutes, watching it carefully. |
Take my word for it. If you leave the soap in the microwave for a few minutes, you'll not only be buying yourself a new microwave, but you may end up buying yourself a new house. And you won't have to worry about having friends, in-laws, or out-laws coming over to visit for the next twenty years. The smell of burning soap is horrendous!
So, for the second time around, I reduced the power level to 60% and set it for two minutes. After about 30 seconds, I could tell that it was going to start burning again if I didn't remove it from the microwave soon.
Like in about 1.3 nanoseconds.
I don't recommend this method. Your house will stink; your family will not thank you. You will probably end up wasting at least one bar of soap. And maybe at least one microwave. No thanks.
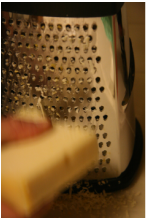
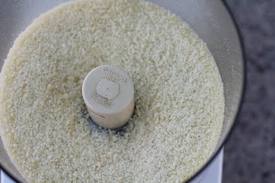
| Grate the soap using the medium to medium-fine size of a cheese grater. Be aware that the soap particles are very light and may float in the air. Try not to breathe in any of the flakes. The grated soap flakes should look like the consistency of grated Parmesan cheese. Or, grate using the large setting/side, and finish up the process by placing the grated soap into a food processor for a minute or two to convert it to small flakes. |
| Use a food processor: first, cut up the soap into smaller chunks with a regular knife and a cutting board; then, place the pieces of soap into the food processor. You will probably want to use the shredding disk or blade to grate the soap, but if you know your regular blade will grate hard cheeses well, you could possibly use your regular blade to grate the soap. |
In a large pot, combine in this exact order:
1 cup soap flakes
10 cups of cool water
1 Tbsp. glycerin
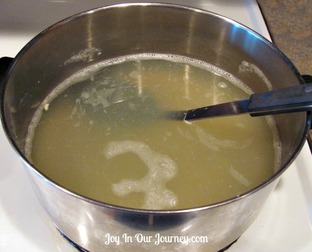
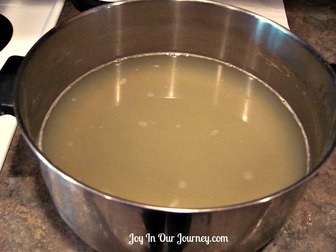
Over medium-low to medium heat (it will depend on your stove), stir the soap mixture until the soap flakes have completely dissolved. This will probably take about 10-15 minutes. Do not let the soap boil! I have a very inexpensive electric range, so I needed to turn the heat up to medium in order to get the soap flakes to melt completely. Your range may heat liquids faster, so watch closely.
When the soap flakes have completely dissolved into the water/glycerin mixture, you'll notice that the liquid soap is the consistency of water. At this point, DO NOT POUR THE LIQUID SOAP INTO YOUR SOAP CONTAINERS! The soap isn't quite ready to be used. If you pour it into your containers right away, and it becomes very thick, you might not be able to get the thickened soap out of the containers so you can thin it down.
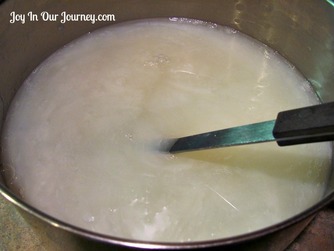
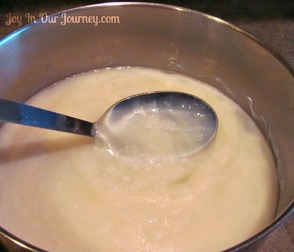
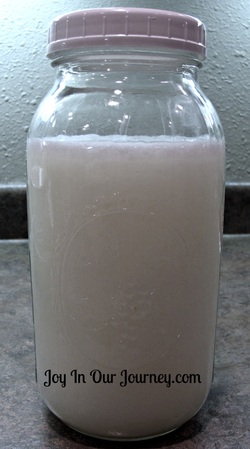
Let the soap cool completely. If the cooled liquid soap has the consistency of water, let it sit out for 12-24 hours. It should thicken up nicely, and it may also have a pearl sheen to it, depending on the type of soap you chose to use. Next time I make this soap, I'm going to let it sit for about 12 hours, to see if it makes a difference. (It's okay to stir it once in a while, to check the consistency of it.)
Here's the thing. I don't normally talk like this, but this is the only way I can think of for you to understand the consistency of the soap after 24-48 hours: snotty. Snot-like. Like snot. Blech!
And no, I didn't let my children talk like this when they were younger. But that's because they're girls. And I'm female. If they had been boys, and my husband was in charge of the boys for the day, well, who knows?
Heh-heh.
But that's really the only way to explain the viscosity of the liquid soap. It's just plain odd.
Now, here's the part where you'll need to be flexible. If your liquid soap seems too thin, you can follow some or all of the suggestions found below. If your liquid soap seems too thick, you can thin it with water, or you can dilute it greatly and use it in a foaming soap dispenser.
If your cooled liquid soap seems too thin:
Option #1: Stir 3 tablespoons of table salt into 8 oz. (1 cup) hot water until dissolved. Whisk a small amount - a tablespoon at a time - of the salt solution into the cooled runny soap mixture until the soap reaches the thickness you prefer. You might find that you need more of the salt solution to help thicken up the soap. Let the soap sit for another 8-12 hours, if needed.
Option #2: If your liquid soap is still too runny, use your hand blender or hand mixer to blend the soap. You'll be surprised at how quickly it will become thick and creamy.
Option #3: There's always going to be an odd one in each bunch. If your soap is still too thin, bring the mixture to a boil (no lid needed). Skim off any bubbles or suds as it boils. Allow the soap to boil for a minute or two; then, remove the pot of liquid soap from the heat and set it aside to settle and cool. This may take a few hours.
Option #4: Add some xanthan gum to the liquid soap. I haven't tried this, so I can't give you any advice on how to use it.
In my case, I let the soap sit for 48 hours (I used homemade goat milk, olive oil, and coconut oil bar soap), and it had thickened up nicely without being overly thick. However, to reduce the snot-like consistency of the soap, I went ahead and used my hand mixer to try to blend it a bit better. I think it would have been better if I had only let it sit for 12-24 hours at the most. You may find that you just need to experiment with it a little bit.
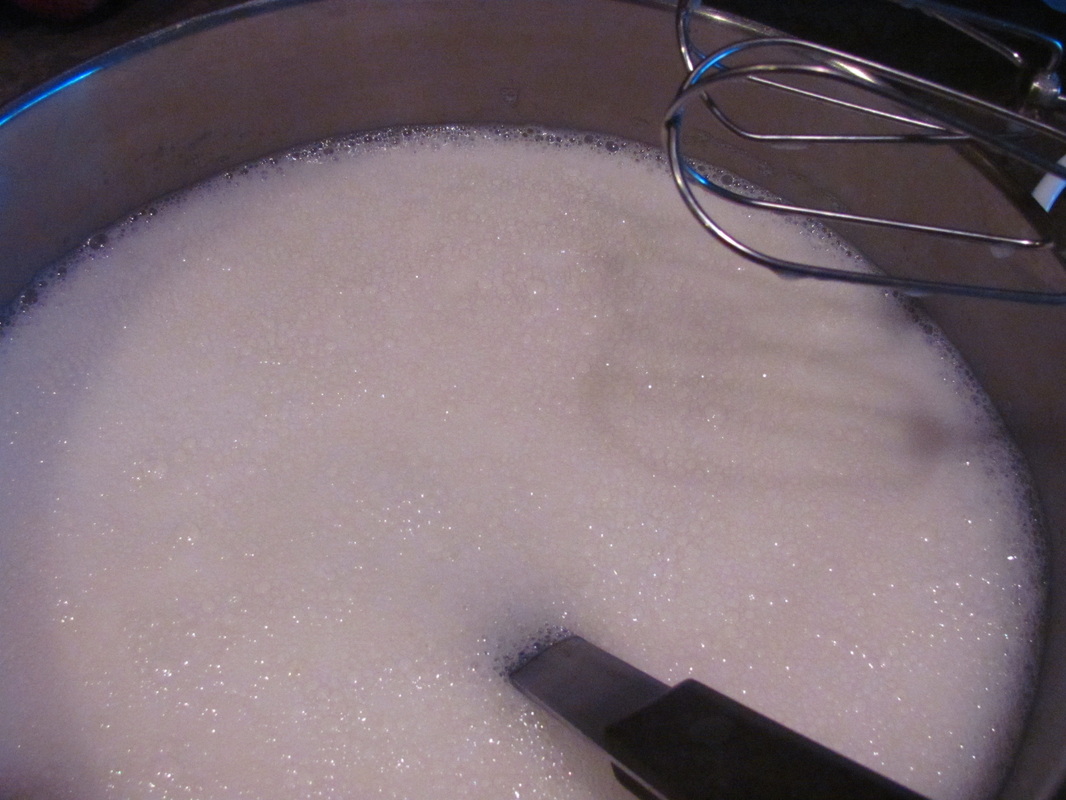
| The liquid soap should be thicker and "snot-like" by this time. If you don't like the snot-like consistency of the soap, get out your hand mixer, stick blender, or whisk. Carefully and slowly blend the soap together until the consistency is more like typical liquid soap. Watch those beaters, though! The soap wanted to "climb" the beaters and show the mixer who was boss! I didn't want the soap to get up inside the mixer. |
Watch closely so the soap doesn't begin to form lots of bubbles on its surface. But if you accidentally mixed it too long with the hand mixer, like I did, and you now have bubbles soaring out your kitchen window, no worries. It will settle back down in about four hours. Ask me how I know.
| One more thing: once you feel your soap is at the thickness you prefer, I recommend leaving 2" head space or more at the top of the soap dispenser. This way, if the soap seems too thick, you have room in the dispenser to add some additional water and shake it up well. If the soap seems too thin, you can add a bit more liquid soap and shake to blend. See? Flexibility is the key here. It's like a science experiment! |
| I just {heart} storing things in glass canning jars, especially the half-gallon size! If you choose to store your liquid soap in a canning jar, it would probably be best to use a plastic lid, not a regular metal canning lid, due to the pH of the liquid soap. I can't promise you that a metal lid will rust, but the metal rings did get a bit rusty when we had originally purchased homemade liquid soap from an acquaintance. You can also store your liquid soap in well-rinsed milk jugs or distilled water jugs, but I don't recommend this. Those jugs are not designed for long-term storage. I've heard of people finding burst jugs in a basement. With water, it would be a nuisance, but can you even imagine trying to clean up a large puddle of liquid soap? Ugh. |
After two weeks of using this homemade liquid soap, how do we feel about it?
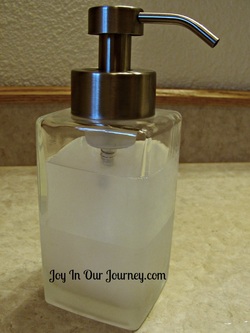
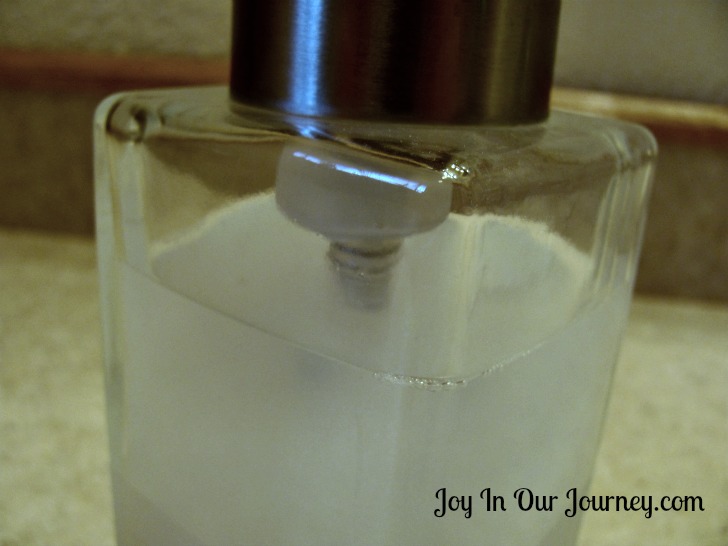
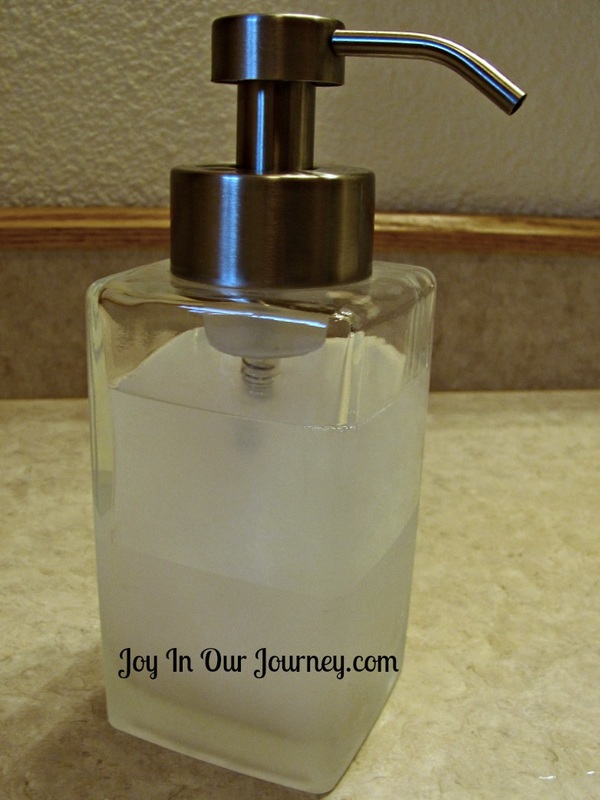
| | See this beautiful, glass foamy soap dispenser? This is the ultimate, best soap dispenser I've ever used that is designed to save $ by turning diluted liquid soap into foamy, bubbly soap. I've tried Pampered Chef's version, another brand I don't recall, and have even purchased and emptied out the liquid soap from a Dial brand soap foamy dispenser. This particular soap dispenser in the photo came from Bed, Bath, and Beyond, and we have really enjoyed using them. We have one in a bathroom, and one in the kitchen. We've generally added 1" of undiluted liquid soap and filled the rest of it with water. Unfortunately, it isn't working very well with our homemade liquid soap, even diluted. It's hard to push on the hand pump most of the time. If the soap is too diluted, then it doesn't feel like it is cleansing our hands. If the soap is at the dilution it needs to be, it's too thick to work well in the dispenser. |
I'll let you know what I find out. Should this soap be a bit more inconvenient to use around the house, we're still going to use it until it's gone. I'd really enjoy trying to make a batch of this with Yardley of London's Lavender bar soap, to see how it interacts and works, but I haven't decided yet. I've heard online that Yardley of London soaps work really well, even though they are made from a long list of chemicals and possibly haven't gone through the full saponification process. It might not work so well for my own family's hands, but it might be a nice gift for someone else.
If you decide to give this a try, I'd enjoy hearing how it went for you! Just leave a note in the comments section and share with us the type of bar soap you used and how it is working (or not working). Or, if you already make homemade liquid soap and have a different technique that works better for you, please let us know!
The way this soap feels on our hands is different than the liquid hand soap we've used in the past. But I do believe it's going to work well enough for us that it will be worth spending 30 minutes of time every 6 months to make a new batch of homemade liquid soap!
Copyright © 2012 www.JoyInOurJourney.com. All rights reserved.
Sometimes, though, trying something new is absolutely necessary. Here's our story of why we started using castile (olive oil) soap instead of the everyday regular soaps found in the local stores. We noticed the change almost immediately - meaning within 2-3 days! I recommend doing this, if you are having any redness, dryness, or itching on your hands or skin.
Why we started using liquid castile soap
Our family switched to castile soap about five years ago. Why? It's harder to find, or at least it was five years ago, w-a-y more expensive, and did I mention that it costs a lot more than the typical soap in the grocery stores?
My husband, Elmer, and I were finding that during the winter months here in the Pacific Northwest, our hands were becoming dry and chapped. Then, our oldest daughter, Kelsi, began to have horribly red hands whenever washing with soap.
I'm talkin' beet-red hands!
We figured it must have been the anti-bacterial chemical added to the liquid soap that was causing the problem, so we switched to "anti" anti-bacterial soap. :)
Basically, regular liquid hand soap not containing the anti-bacterial chemicals, in case that was difficult to follow.
Her hands improved some, and so did ours - but not well enough.
I couldn't figure out why our hands weren't improving like I thought they would. What was wrong?
Thankfully, my friend Wardeh, from www.GNOWFGLINS.com, suggested that we try castile soap.
Huh?
I learned from her that the traditional method of making soap (the saponification process) is done so that the soap is generally very gentle to the skin. However, modern commercial soaps usually don't go through the saponification process, so they are basically "detergent" rather than true soap. Chemicals are added to make the "soap" firm, have a pleasant fragrance, have a nice color, and make lots of bubbles. But most regular, commercial soaps should be considered as "detergent", not actual soap. Real, actual soap has very few ingredients.
Yuck! Do I really want to be washing my hands in detergent throughout the day? No wonder our hands were a mess!
What in the world is castile soap?
Guess what? Castile soap was exactly what we were needing! Literally within several days, my daughter's hands went from brilliant red to a healthy pink. Elmer and I noticed that our hands weren't cracking and feeling overly dry anymore. Wow!
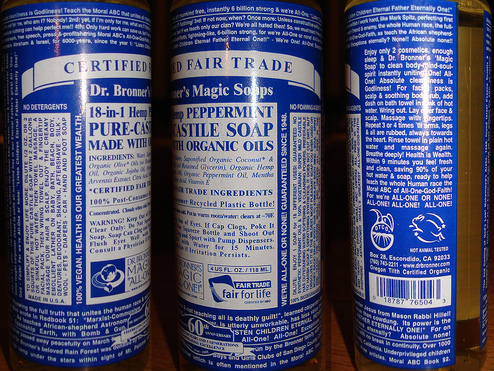
| Within a week, we were ready to go out and buy a ton of stock in the castile soap industry. Just kidding. :) The main option we found, at first, was Dr. Bronner's Magic Liquid and Bar Castile Soaps. They were the least expensive at Trader Joe's, so that worked for us even though it was an hour away from our home. I just made sure to stock up whenever we headed that direction a few times each year. |
| After a few months, we realized that Trader Joe's had begun to sell their own brand of castile liquid soap, and it was much less expensive. Hooray! However, after several years, Trader Joe's stopped selling liquid castile soap. Don't ask me why! I think it was a big mistake for them to do that. They were competing well with the Dr. Bronner's brand. The price was much better. |
When Trader Joe's stopped selling their own brand of liquid castile soap, we decided we didn't want our finances to go toward Dr. Bronner's company. If you've read the label on his liquid castile soap bottle, you may have an understanding of where their company comes from. After watching the movie made about Dr. Bronner's company, we both felt uncomfortable about purchasing their soap. Now, if you're okay with buying soap from Dr. Bronner's, that's fine. Millions of people have done this and love it. Each to their own. We've chosen to vote with our dollars.
But I was out on a quest to find another source for liquid castile soap! And I wanted to try to pay as little as possible for it.
Last summer, I found a homeschool graduate who said that while she hadn't made liquid castile soap herself, she was very comfortable making both bar soap and liquid soap that contained goat milk, coconut oil, and other natural oils. She agreed to give castile olive oil soap a try! I bought 10 quarts of liquid castile soap from her ($100 for about a year's worth) and a year's supply of castile bar soap for another $100. See? This is not cheap soap. It works out to be about $10 per quart of liquid soap, and about $4 per bar of castile soap at 2011 prices.
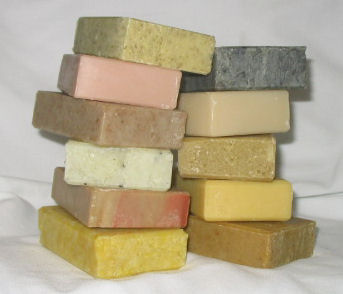
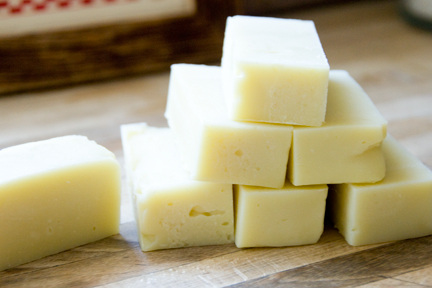
So, after doing quite a lot of research on the internet this summer, I decided to try to make my own soap. I cheated, though. I'll admit it - I went to a friend's house, and she taught the girls and I how to make our own bars of soap! This time, they were made with goat's milk, olive oil, coconut oil, and maybe palm oil? I'm not sure. I still need to ask her to send me the "recipe" via email.
Our skin has liked this soap, too, and it was quick and easy to make the bars of soap, enough to last a year - at least. And at 75 cents per bar, this is much less expensive.
We now use bar soap in the shower, but I really don't prefer to have messy, slimy bar soap next to the bathroom and kitchen sinks. I was determined to learn how to make some liquid castile or goat milk hand soap, and now I have!
Want to learn how to easily make your own liquid hand soap, at a fraction of the price you pay for even commercial liquid hand soap?
Stay tuned tomorrow when I share with you how you can easily do this at home! You can even do this with $1 bars of Yardley of London soap from the Dollar Store or Amazon.com. You won't need to make your own bar soap or specifically use castile or goat milk soap in order to do this.
Hi! I'm Julieanne!
You'll find me in the kitchen
trying new Trim Healthy Mama recipes, loving God, and carrying out that love as I bless my husband and teen daughters.
Find
Joy In Our Journey on:
Joy In Our Journey's
latest blog posts, freebies, and more!

Search
Joy In Our Journey
Archives
December 2016
August 2015
July 2015
March 2015
February 2015
January 2015
December 2014
November 2014
October 2014
September 2014
August 2014
July 2014
June 2014
May 2014
April 2014
March 2014
February 2014
January 2014
December 2013
November 2013
October 2013
September 2013
August 2013
July 2013
June 2013
May 2013
April 2013
March 2013
February 2013
January 2013
December 2012
November 2012
October 2012
September 2012
August 2012
July 2012
June 2012
May 2012
April 2012
March 2012
February 2012
January 2012
December 2011
November 2011
October 2011
September 2011
August 2011
July 2011
June 2011
May 2011
April 2011
March 2011
February 2011
January 2011
December 2010
November 2010
October 2010
September 2010
August 2010
July 2010
June 2010
May 2010


