|
Christmas can get soooooo crazy and take the JOY out of our lives. But it's not supposed to be this way. God didn't intend it to be this way. My friend, Maria Hurty, found this to be an extreme problem for her as she approached Christmas Day in the past. She writes in her new book, Christmas Crazy to Jesus JOY: An Advent Devotional: Not so very long ago found me on Christmas morning exhausted, angry, hiding in a closet and wishing that my family would just do Christmas without me! I was actually known to admit that I hated Christmas yet continued to work myself to a frazzle attempting to give my family the "perfect Christmas." So what is Christmas all about anyway? Yes, Jesus was born, yes - we do gifts, family, extravagant Christmas dinners, trees, decorations, cards, stockings, fudge, lights, and shopping 'til we drop. But, does it have to be so hectic? Does it have to be exhausting and expensive and stressful? I think not. If you're dreading the coming month, you're doing it wrong. See the photo, below, that shows the back cover of Christmas Crazy to Jesus JOY? Ha! That just about says it all, doesn't it? Are you finding yourself stressed out by Christmas planning and activities like Maria used to do? In the Bible, Jesus says in Matthew 11:28-30: "Come to Me, all who labor and are heavy laden, and I will give you rest. Take My yoke upon you, and learn from Me, for I am gentle and lowly in heart, and you will find rest for your souls. For My yoke is easy, and My burden light."
This isn't a time-consuming book to slog through each day; it's a precious gift of 10 minutes or less that you'll give to yourself as you learn how to treasure every day of December!
Come join Maria as she inspires us with God's words from the Bible in twenty-four short Advent devotionals intended to warm your heart and count down the days until Christmas! Today, you have the opportunity to win a free copy of Christmas Crazy to Jesus Joy by Maria Hurty! Knowing that Maria had just released her new Advent book, I asked her if she would be interested in having it reviewed and could offer one copy as a giveaway. She said, "Yes!" This is a very quick giveaway, being that we're already in the midst of the Advent season, so please enter to win your copy of Christmas Crazy to Jesus Joy by Thursday, December 15 at midnight (Pacific)!
And now, for this beautiful Christmas Advent giveaway!
Enter below, using the Rafflecopter form, for your chance (or several chances) to win a copy!
NOTE: Entrants must be 18 years or older; only U.S. residents are eligible to enter this giveaway. I will randomly select the winner of this prize using Random.org (via this Rafflecopter entry form). Note: I will be verifying the winning entrant's giveaway entry options to make sure they are valid. In the past several giveaways I've hosted, multiple winners were excluded from winning even though their names had been selected randomly as winners, because they said that they had signed up for email subscriptions but had not completed the process, which includes clicking on an email you will receive to confirm your subscription. An email subscription to Joy In Our Journey.com is not a requirement to enter our giveaways, but if you do use an email subscription option to enter to win, please make sure that you click on the confirmation email that you will receive. That will validate your entry. Thanks!
This post was originally posted on http://www.JoyInOurJourney.com
23 Comments

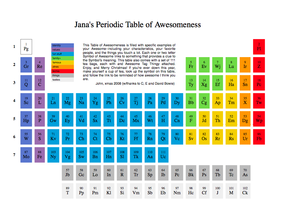
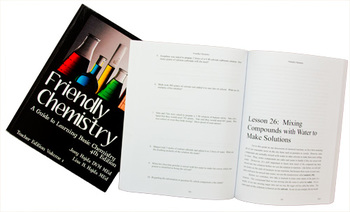
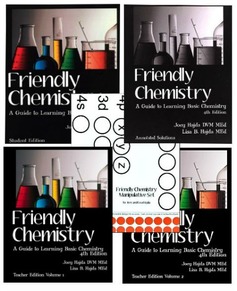
How many of you took chemistry in high school? (My hand is raised.) How many of you remember any of the chemistry you took in high school? (My hand goes down...yours might stay up depending on how brainiac you are or if you are working in a science/math field! My bachelors degree is in Elementary Education, and not much science was/is taught in the lower grades these days, so hard core science is not something I've used since college.) Many parents shy away from upper high school math and science courses. I took Biology, Chemistry, and Physics in high school, as well as Algebra I, Geometry, Algebra II, and Pre-Calculus (Calculus wasn't offered in my public high school back in the day). While I generally received A's and B's in my high school classes, I have to admit that I was a bit hesitant to "teach" chemistry to my oldest last year. But that's crazy to be nervous about teaching chemistry! I mean, technically, if I got decent grades in Chemistry class in high school, I should be able to teach it to my children - or at least relearn it right alongside them, right? I finally remembered last August that really solid, good homeschool curriculum is written as if the parent and student are not familiar at all with the subject matter. In most cases, students are taught to work independently and think and learn on their own. This helps them to be excellent students in college. I had already purchased three other chemistry courses over several years' time (Apologia, Bob Jones, and RealScience4Kids Chemistry), but they weren't the best fit for my family at the high school level. While I have loved RealScience4Kids' curriculum, their high school program was only a half credit of high school-level Chemistry, and the author hasn't finished writing the second half of the program. The problem with Apologia and Bob Jones was that even though we've used quite a few of Apologia's science texts in the past (and they are extremely thorough and much more challenging than anything I ever had in high school and college), the chemistry books were written in a way that made it more difficult to understand the concepts. I would have had to follow very closely and read the text myself to help my daughter when she had questions...and with three high schoolers at home right now, I just knew I wouldn't have the time to do that. My dad, a mechanical engineer, also looked at Apologia's chemistry program and felt the same way - that most modern chemistry courses are written to make the subject much more difficult than necessary. So, I did more online research and learned a bit about Friendly Chemistry. Sure enough, Friendly Chemistry was written to be nearly self-teaching if necessary. I'm so glad I came across this amazing high school chemistry curriculum! Now that we've used Friendly Chemistry in our home for a full school year and will be using it with two more high schoolers this school year, I want to let you know what we thought of the program and then hold a GIVEAWAY for one set of Friendly Chemistry curriculum! About the authors:
Dr. Hajda holds a doctorate in veterinary medicine and a master’s degree in secondary and higher education curriculum and instruction. He has taught science courses at the middle and high school levels for more than 20 years as well as at the community college level. Co-author Lisa, his wife, has a bachelors degree in veterinary science, a masters degree in elementary curriculum and instruction, and has completed coursework toward her doctorate in education.
If you're familiar with Friendly Chemistry at all, did you know this? Three percent of each sale of Friendly Chemistry goes directly to support the "Water 4 Haiti" ministry. How neat for the authors to bless others through the sales of their products.
|
|
NOTE: Entrants must be 18 years or older;
only U.S. residents are eligible to enter this giveaway. I will select the winner of this prize using Random.org (via this Rafflecopter entry form). |
|
An email subscription to Joy In Our Journey.com is not a requirement to enter our giveaways, but if you do use an email subscription option to enter to win, please make sure that you click on the confirmation email that you will receive. That will validate your entry. Thank you!

(I hate to admit it, but I've slacked on menu planning for several months and need to get back into the habit.)
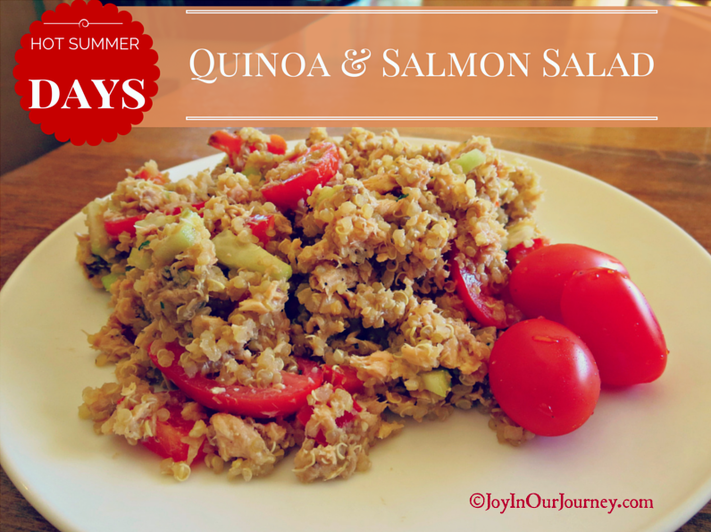
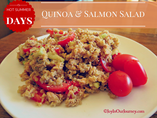
I like to use BuildAMenu.com for menu planning because it matches up grocery store sales with the style of eating my family prefers. In addition, I'm also able to add my own recipes to the menus as I desire, which is a great feature! I was able to pick out a great menu of cold, chilled salads and chilled main dish recipes that also fit in with Trim Healthy Mama's weight loss plan! Here is one of our favorites from this week so far. I adjusted it to add in twice as much canned salmon to add more meat as our youngest daughter needs to eat a lot more protein.
- 2 cups water
- 3/4 tsp. salt, divided
- 1 cup quinoa, rinsed well and drained
- 1/4 cup lemon juice
- 2 garlic cloves, minced
- 1/4 tsp. pepper
- 2 large cans salmon, drained (optional: only use 1 can to make this recipe more economical)
- 1 bell pepper (any color), diced
- 1 cup grape tomatoes, halved (or 2 Roma tomatoes, diced, to save money)
- 1 cucumber, diced
- 1 tsp. parsley flakes, dried
Bring water and 1/2 tsp. salt to a boil in a medium saucepan. Add quinoa and return to a boil. Reduce to a simmer, cover, and cook until the water has been absorbed, 15-20 minutes. Spread the quinoa in an 8x8" cake pan (or similar) and place it in the refrigerator to chill for 10-20 minutes or longer. Meanwhile, whisk together lemon juice, garlic, the remaining 1/4 tsp. salt, and pepper in a large bowl. Add the cooled quinoa, salmon, bell pepper, tomatoes, cucumber, parsley; toss well to combine. Add additional salt and/or pepper to taste.
This was so delicious - and even better when I had the leftovers for lunch the next day. Yum!
Let me know what you think! If you have other favorite canned salmon recipes you enjoy, let us know in the comments.
This next week, I'm going to literally jump in with both feet and do something I've been afraid to do now for many years.
Why?
I don't want to be characterized as someone who is fearful - of the unknown, of trying new things, of what could happen if I push myself more than what I'm used to.
And...my daughters have convinced me that this is a good thing. A very good thing.
(We'll see about that!)
So - what am I doing next week?
Drumroll, please . . .
Okay, I know the suspense is killing you, right? ☺
I'm joining . . .
Crazy, right? If you know me well, you know that I would rather read a book, chat with friends online, hang out with my family, and even do household chores before I'd exercise.
It's not that I hate exercise. It's just that I greatly dislike sweating. But sweating is so good for my health. I've learned that it helps the body to release toxins and impurities through the skin. So when we go for years and years and purposefully avoid sweating due to exercise, we're robbing our immune systems of getting healthier.
I've been eating a low carb diet for over two years now, and still haven't lost more than 20 lbs. Ugh. I now think a lot of that comes down to not fitting fitness into my life.
I've made all the excuses in the world as to why I can't exercise:
- Not enough time in the day to fit it in (that will always be a valid excuse in my mind, even if I had tons of free time)
- Can't afford a gym membership
- Can't stay motivated enough to keep up with a fitness routine/schedule at home on my own
- Greatly dislike sweating
- Have a bad shoulder and am afraid of making it worse
- Was made fearful of participating in group fitness and sports in public school P.E. classes because I was usually one of the last people "picked" for teams
- Never received an "A" in high school P.E. solely because no matter how hard I tried, I could not touch my toes when stretching. Those crazy long legs and short torso made it impossible for me!
Five months ago, my youngest daughter (age 15) made arrangements to exchange cleaning a portion of one of our local Crossfit gyms once a week so she could participate in its M/W/F Teen classes. Since it was taking over two hours to do the cleaning, and I had to drive her down to the gym and stay with her while she cleaned (at night, after the gym closes), I eventually decided to work alongside her to get the cleaning job down to 75 minutes like the owner expected. Hey, I loved the thought of sitting on the couch down at the gym, reading a book for two uninterrupted hours each week (!!!), but I really didn't want to be away from home that long in the evening. I offered to help her clean, so for 75 minutes once a week, she and I are cleaning buddies.
Three months ago, younger sister convinced older sister (age 17) that she needed to start participating in Crossfit. She also made arrangements to clean gym equipment once a week in exchange for her Crossfit membership.
After a number of months, it dawned on me that since I was working the required length of time as well, hey, maybe I could join Crossfit for free, too. (What a thought!) The owner agreed, so I'm starting my two weeks of Fundamentals classes this next week - woo-hoo!
I'm terrified. I know I'm going to start really slow and small. I've watched some of those women work out, and they are strong and powerful! My goal isn't to become a bodybuilder - not at all. That just doesn't appeal to me at all. What I want to do is become stronger, be more aware of the strength I should have in my muscles, become more physically fit, SWEAT (yes, even that!), get trimmed up a bit, and make that Vitamin D work better because I'm doing strength training along with a healthy eating lifestyle.
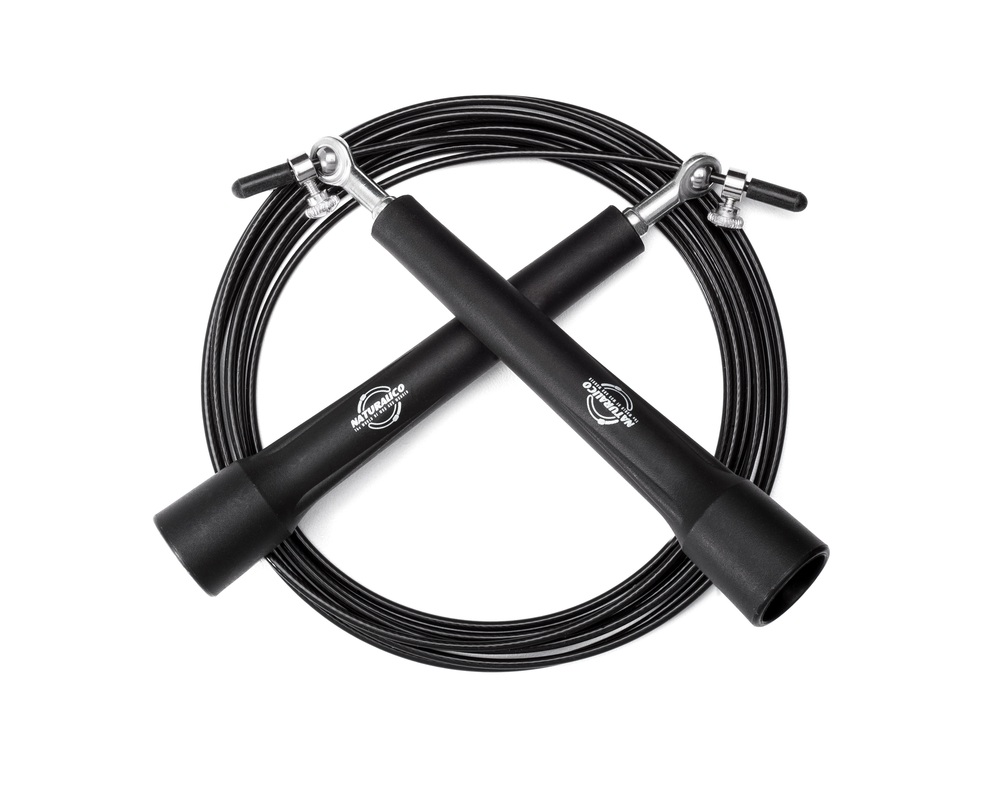
One of the tools that Crossfit members use on occasion is a fitness jump rope. My oldest daughter, Kelsi, has been using the fitness jump rope you see in the image, above, the fast speed cable Speed Jump Rope by Bella Naturals. While we are able to use speed jump ropes that belong to the gym, having one's own jump rope means that the length is customized for the individual - and that makes the workout with a jump rope so much more effective. Here's what we've learned about jump roping as a workout:
- Short, intense jump rope circuits are an effective way to burn both during and after a workout.
- Just 10 minutes of jump roping can provide the same calorie burn as 30 minutes of slow cardio workouts.
- Jump roping is perfect for Crossfit training and exercise beginners, WOD's (Workout of the Day), boxing, MMA training, and more
The Speed Jump Rope by Bella Naturals contains ball bearings which are meant to increase the number of revolutions per minute, making it an ideal jump rope - especially if you need to achieve double and triple unders, as well as best PRs in your workout. The Speed Jump Rope comes with these features:
- Unlike other ropes which have cheap plastic ball bearings, this has 4 high-grade metal ball bearings, which promote faster turning of the rope and longer durability.
- The rope is also very light, making it easy for beginners to use
- The cable is 10 feet in length and is adjustable to be used by people of different heights
- The jump rope also includes a free nylon bag to carry it in
- This comes with a limited lifetime manufacturer guarantee
This jump rope has worked out well for my daughter, so now it's time to buy my own. ☺ Along with the new workout shoes (my walking shoes were very old and stiff and wouldn't work so well for Crossfit), workout pants, and longer tank tops (for underneath) and longer t-shirts (no bellies showing here!), I think I'm ready. At least in the clothing department. Heh, heh.
So if you see me hobbling around for the next month or so, now you know why. But I think it is going to be worth it. The local owner of this particular Crossfit gym is very careful in helping people train properly so they don't injure themselves. He is aware of my shoulder, and he will allow me to compensate for it so I don't hurt myself further.
But the soreness I'm expecting for the next long while? Well, that can't be avoided. It's the nature of exercising. Pray for me!
What kinds of exercise equipment have you found to work the best for you, personally? Do you do any speed jump roping? If so, how do you like it?
But we certainly did our best!
We knew that our once-in-a-lifetime trip to Washington, D.C. as a family was an amazing opportunity, so we didn't want to waste any time at all - and we were determined to see as much of the area as we could.
Here are my tips and our family's schedule so we were able to see more than most people see in seven days' time:
- Realize that you won't be able to see every display or object in every museum, so plan ahead and figure out which floors and exhibits you'll want to explore at different Smithsonian museums
- To save a lot of time, eat at restaurants that are more like "fast food" but still very good (like many of those at Union Station)
- Use the Metrorail instead of driving a car and spending hours trying to find a place to park
- Walk a bit more on the brisk side instead of meandering slowly from place to place. It's great exercise!
- Plan your trip out ahead of time, knowing that you may need some flexibility in case your Metrorail car is delayed due to power outages or breakdowns
- If you have more money to spend, consider a tour of the National Mall on a rented bicycle or a Segway
Day One:
*Ride the Metro from the hotel to Reagan International Airport to rent a car for the next two days
*Drive to George Washington's vast estate, Mt. Vernon Memorial, in Mt. Vernon, Virginia for the remainder of the daylight hours (this was my family's most favorite part of the week!)
*Dinner in the Mt. Vernon area
*Drive back to Washington, D.C. and view the National Mall memorials at night
Day Two:
*Drive to Manassas National Battlefield Park in Manassas, Virginia (allow about 1 hour for your visit)
*Chick-fil-A for lunch in Charlottesville, Virginia (trust me, if you've never eaten at Chik-Fillet, it's a neat experience!)
*Drive to Monticello, Thomas Jefferson's estate, located in Charlottesville, Virginia (allow yourself at least 2 hours to visit)
*Dinner in Charlottesville, Virginia
Day Three:
*Return car rental to Reagan International Airport
*Tour Arlington National Cemetery and view Changing of the Guard
*Tour Arlington/Lee House
*National Museum of the American Indian (eat lunch in cafeteria there for a wide variety of Native American foods)
*Tour the U.S. Capitol Visitor's Center
*Tour the Library of Congress
*Walk around the White House area
*Dinner at Union Station (inexpensive and moderately priced dining options, many international)
Day Four:
*Ride Metro to visit the Pentagon and 9-11 Memorial
*Ride Metro to the U.S. Marine Corps War Memorial (Iwo Jima)
*Take Metro to the Rosslyn stop to go up extremely long escalator!
*Coffee at Panera Bread
*Ride Metro to Fords Theater and Petersen House where President Lincoln died
*Lunch at the National Gallery of Art
*National Archives Museum
*Smithsonian National Museum of Natural History
*Metro to Kennedy Center for a FREE performance! (and walk past Watergate)
*Dinner at Union Station (inexpensive and moderately priced dining options, many international)
Day Five:
*Smithsonian Castle (This was our one disappointment. It's just an administrative building, best viewed from the outside. No tours are provided. I would recommend not visiting this castle.)
*Crime & Punishment Museum
*Lunch at Union Station (inexpensive and moderately priced dining options, many international)
*National Cathedral
*Dinner at Whole Foods near Metro stop
Day Six:
*Bureau of Engraving and Printing
*United States Holocaust Memorial Museum
*The National Museum of American History (lunch in cafeteria)
*Smithsonian National Air & Space Museum
*Dinner at Union Station (inexpensive and moderately priced dining options, many international)
Day Seven:
*Metro to Union Station for Starbucks ☺
*Smithsonian National Postal Museum
*Back to hotel to check out
*Airport and fly home
Questions? Helpful tips?
Read my other "Frugal Family Tips for a Visit to Washington, D.C." here!
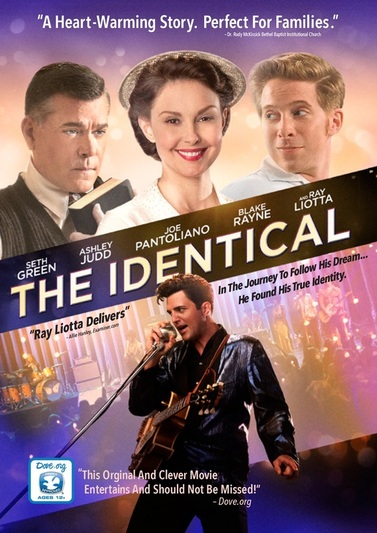
| The Identical came out in the movie theaters in Summer 2014, and I wanted to go see it with some friends. However, our plans didn't work out, and we missed seeing it at the theater. So I was excited when the DVD version arrived at my house for me to review and host a giveaway of it. But can I be completely honest with you? My family was sooooooo not on board with watching The Identical. All they could say is, "We are NOT going to watch a movie about a fake Elvis impersonating another fake Elvis!" And then there were all the jokes about the "Fake Fake Fake Elvis". I wasn't happy. |
But I finally convinced them to give me 15-20 minutes to watch the beginning of the film. The deal we made was if the acting and/or cinematography and/or music score was lame, they could leave and go do something else.
Wanna know what my family thought of "The Identical"?
They actually really liked it!
Wow. I was so surprised. ☺ Pleasantly surprised.
The acting was on par with other films in the theater, unlike some of the lower budget Christian movies I watch from time to time.
The music score was original and fresh, without being distracting. Not too busy - and not too boring. It was pleasant to listen to.
Cinematography was very good. All in all, it was a film we were thankful we had the opportunity to watch.
And my teen girls were very surprised that in the Great Depression era, sometimes babies and children were adopted out to other families simply because some parents couldn't afford to feed more than one or two children. That's such a tragedy.
About "The Identical"
On Jan. 8, 1935, Elvis Presley was born in Tupelo, Miss. His twin brother, Jesse, was stillborn.
What if Elvis' brother had lived?
That's the theme of The Identical, a movie not actually about Elvis all.
The Identical is about twin brothers Ryan and Drexel who are separated at birth. During the course of this 107 minute long, rated PG film, the twin brothers, though separated almost at birth, grow up looking and sounding like Elvis.
One of the twin boys grows up to have a wildly successful "rock star" career...while the other twin boy -
well, I don't want to spoil the story.
Anyway, here's why The Identical received a PG rating:
- mild "hip shaking" Elvis-style, and some couples dance in a mildly sensual way
- a wife wears a dress that shows cleavage
- a police officer hits one of the twins in the face
- one use of h---, one use of "Oh, my G-d", and one use of "Oh, my L--d"
- a few cases of characters drinking and smoking
- a police officer describes a roadhouse full of African-Americans as "dark and nasty"
I thought some of you would want to know any negative aspects of this film for your own sake or in case you have children watching it with you.
"The Identical" DVD Giveaway
| Fine print: Entrants must be 18 years or older; only U.S. residents are eligible to enter this giveaway. I will select the winner of this prize using Random.org (via this Rafflecopter entry form). |
An email subscription to Joy In Our Journey.com is not a requirement to enter our giveaways, but if you do use an email subscription option to enter to win, please make sure that you click on the confirmation email that you will receive. That will validate your entry. Thank you!
Many thanks to Propeller Consulting, LLC for providing this prize for the giveaway. Choice of winners and opinions are 100% my own and NOT influenced by monetary compensation. I did receive a sample of the product in exchange for this review and post.
Only one entrant per mailing address, per giveaway. If you have won the same prize on another blog, you are not eligible to win it again. Winner is subject to eligibility verification.
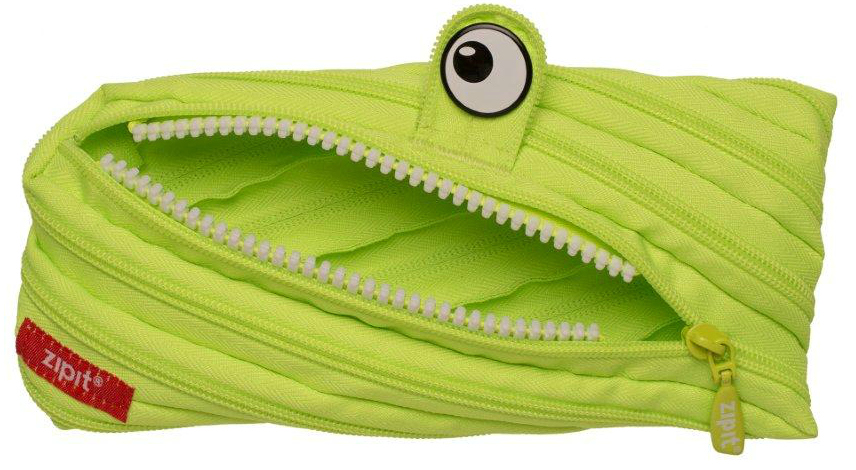
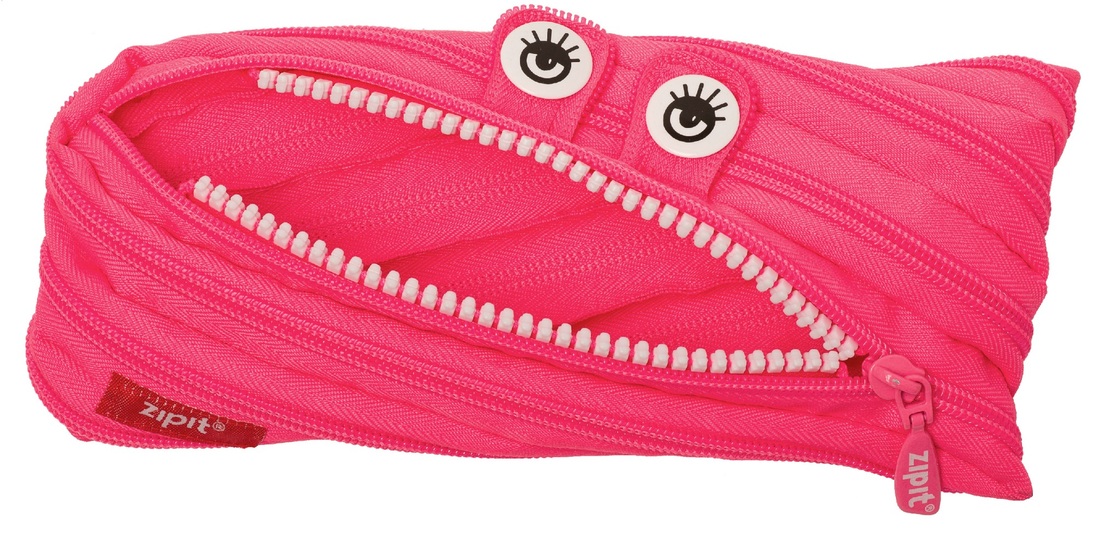
So, Kelsi (our oldest, age 17 now - wow!) and I were shopping around Thanksgiving, picking up a few things we needed, and we burst out laughing! Okay, so we were in a giggly, goofy mood already, but when I zipped and unzipped the mouths on these Zipit Monster Pouches, we both cracked up!
I think we got a few stares. And maybe a few glares. But it was fun, anyway. ☺ And very worth it.
I bought a coin purse Zipit Monster Pouch and a dollar bill sized Zipit Monster Pouch for Kelsi for Christmas, since she didn't have anywhere to keep coins and bills in her purse. She didn't really want them to disappear for a few weeks until she would open the gifts at Christmas - but she patiently endured. Ha!
| Would you believe that these clever Zipit Monster Pouches completely unzip until they are one long heavy duty zipper?!?!??!!!!!! Most zippers these days are not very high quality, making it frustrating to use zippers, in general. But we've found that the Zipit zippers are heavy duty and very durable. I think your children and teens (and you?) will love them. At least, our family does. ☺ |
Then, I realized I could share about these here and host a Zipit giveaway ! ! !
Pick one with one eye, two eyes, or two eyes topped with luxurious lashes. All Monster Pouches are made of a single, long zipper. Unzip the fun!
Zipit Monster Pouch Giveaway:
| Fine print: Entrants must be 18 years or older; only U.S. residents are eligible to enter this giveaway. I will select the winner of this prize using Random.org (via this Rafflecopter entry form). |
I will be verifying the winning entrant's giveaway entry options to make sure they are valid. In the past several months, multiple winners were excluded from winning even though their names had been selected randomly as winners, because they said that they had signed up for email subscriptions but had not completed the process, which includes clicking on an email you will receive to confirm your subscription. An email subscription to Joy In Our Journey.com is not a requirement to enter our giveaways, but if you do use an email subscription option to enter to win, please make sure that you click on the confirmation email that you will receive. That will validate your entry. Thank you! :)
Many thanks to Zipit and Tomoson for providing this prize for the giveaway. Choice of winners and opinions are 100% my own and NOT influenced by monetary compensation. I did receive a sample of the product in exchange for this review and post.
(By the way, this is not a paid review, just so you know. This just happens to be a brand new food on the market that is THM-friendly and delicious at the same time!)
I don't know about you, but when our family switched to the Trim Healthy Mama-style of eating, we began to miss some of the crunchy, crispy salty snacks that we had enjoyed in the past.
We still keep raw nuts around the house, those nuts that haven't been combined with oils we prefer not to use, like sunflower oil, safflower oil, canola oil, and the like.
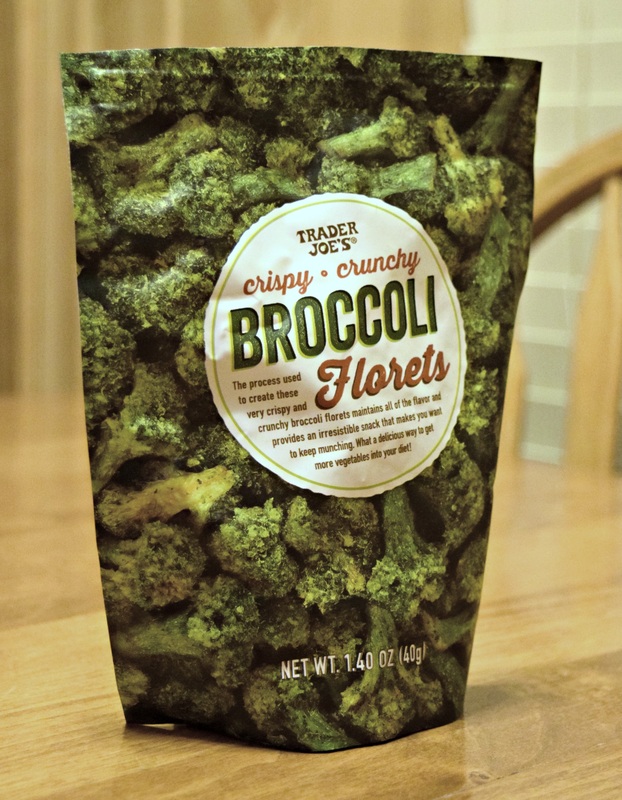
So...imagine my excitement when I found this new CRISPY, CRUNCHY SNACK at Trader Joe's!
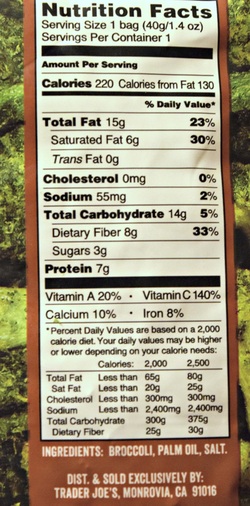
| We were a bit hesitant to give it a try when I brought the package of Trader Joe's Crispy Crunchy Broccoli Florets home, but we enjoy trying new things, so we dove in. And we all loved these! They are truly crispy, crunchy, and yummy! But what about the nutritional facts? Well, this is definitely an "S" food for Trim Healthy Mamas. Actually, the entire bag is considered one serving...but I definitely wouldn't eat the entire bag at one sitting. It's a small bag, but still! The flavor and texture is much better than we expected, and now I wish I had purchased multiple bags of these when I was at TJ's today. Well, we'll have to wait another month until we visit our nearest Trader Joe's (over an hour away). |
So . . . what do you think? Would you consider giving these a try? ☺
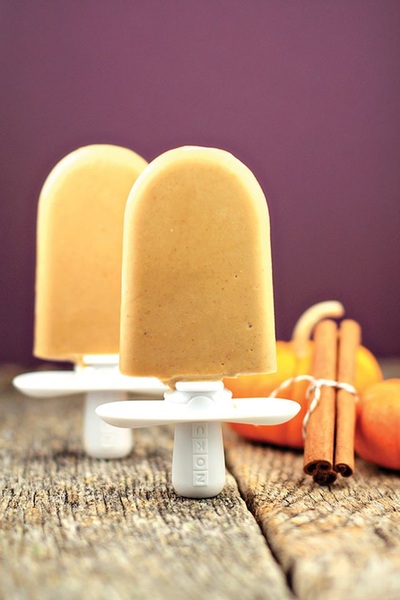
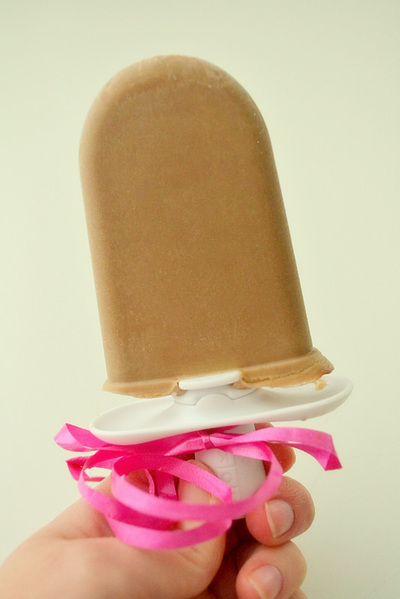
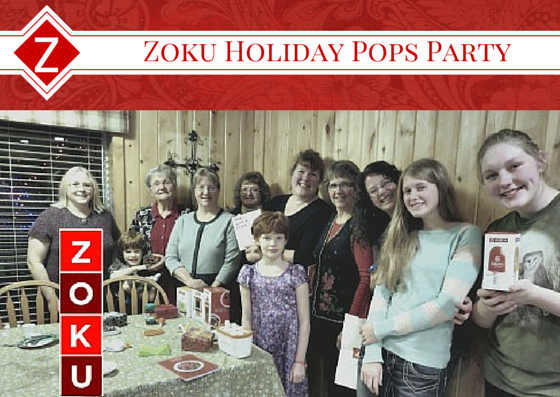
I recently hosted a Zoku Holiday Pops Party because I've enjoyed using Zoku products in the past. While I did use recipes that contained sugar at the party, I'd like to share some healthier options for making delicious frozen treats.
Are you ready? Here you are!
(To pin any of these recipes, hover over the images and the "Pin It" button should appear.)
Healthy Popsicle Recipes:
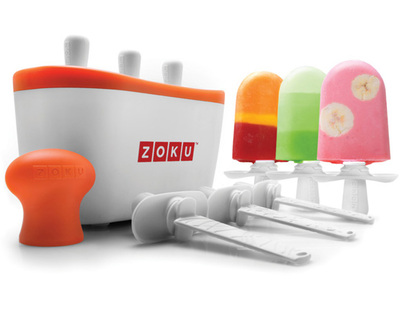
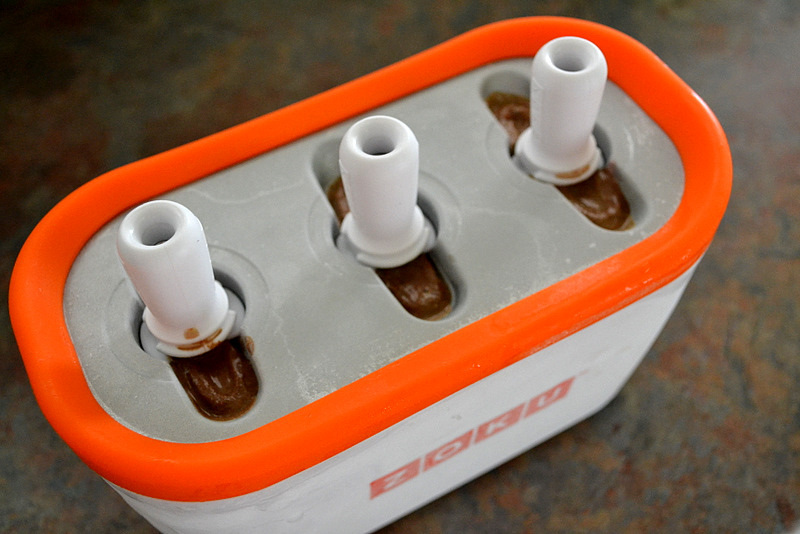
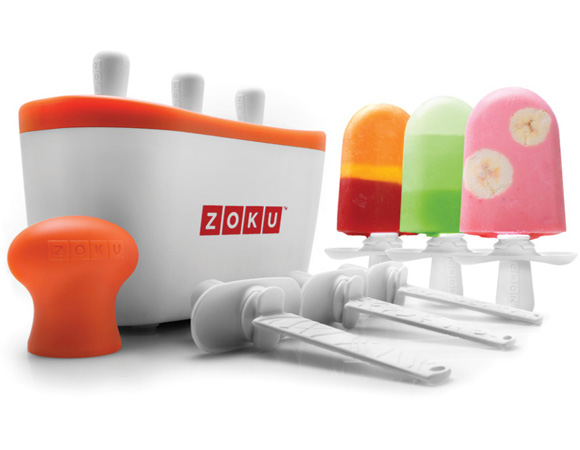
| The recipes below were made using the Zoku Quick Pop Maker, which is so much fun because popsicles are easily made in 9-12 minutes - woot! If you don't own a Zoku Quick Pop Maker, consider one! They are a lot of fun to use with children. I think the younger children who attended my party had the most fun of all! I've adapted these recipes to work for a healthy, low-carb eating plan like Trim Healthy Mama, since those are typically the types of recipes I share here. |
- 9 ounces orange juice; divided use
For the cranberry sauce:
- 6 ounces fresh cranberries (about 1-1/3 cup)
- 4 ounces orange juice (½ cup)
- ½ cup granulated sweetener (like Swerve Sweetener or Truvia)
- zest of one orange
MAKE THE CRANBERRY-ORANGE BASE
- In a medium saucepan over medium heat, dissolve sweetener in ½ cup orange juice. Stir in the fresh cranberries and cook until the cranberries begin to pop, about 8 minutes. Remove from heat and place sauce in a bowl. Cranberry sauce will thicken as it cools. Place in refrigerator for at least two hours.
- Remove Cranberry-Orange Sauce from the refrigerator and place into a blender. Add in 6 ounces of orange juice and blend until smooth (mixture will be slightly thick).
ASSEMBLE THE POPS
- Remove Zoku Quick Pop Maker from the freezer. Insert sticks and pour about ¾ ounce of cranberry-orange base into each cavity; allow layer to freeze completely.
- Pour ½ ounce orange juice into each cavity directly on top of the cranberry-orange layer; allow layer to freeze completely.
- Pour another layer of the cranberry-orange base up fill line in each cavity (approximately ¾ ounce per pop); allow layer to freeze completely.
- Remove the pops with the Super Tool. Repeat with remaining pops.
Makes 6 popsicles.
- 2 teaspoons instant espresso powder
- 2 tablespoons warm water
- 2 tablespoons granulated erythritol-stevia based sweetener like Swerve Sweetener or Truvia
- 2 teaspoons pure vanilla extract
- ¼ cup pure pumpkin puree
- ½ teaspoon pumpkin pie spice
- 1/2 cup cold water
- 1/2 cup (4 ounces) heavy cream
MAKE THE PUMPKIN SPICE LATTE BASE
- In a medium bowl, whisk together the instant espresso granules with 2 Tbsp. warm water until granules have dissolved completely.
- Whisk in the sweetener, vanilla, pumpkin puree, pumpkin pie spice, cold water, and heavy cream until thoroughly combined and smooth.
- Chill mixture (if not chilled, pops will take longer to freeze).
- Remove Zoku Quick Pop Maker from the freezer. Insert sticks and pour the pumpkin spice latte base until you reach the fill line.
- Let freeze completely; then remove the pops with the Super Tool.
- Repeat with remaining mixture.
Makes 6 popsicles.
- 1 cup (4 oz) fresh or frozen raspberries
- ½ cup (3 oz) fresh or frozen blueberries
- ½ cup (2 oz) fresh or frozen blackberries
- 2 oz light rum (optional)
- *½ cup simple syrup (1/2 cup sweetener, dissolved in 1/2 cup boiling water and cooled)
MAKE THE BERRY MOJITO BASE
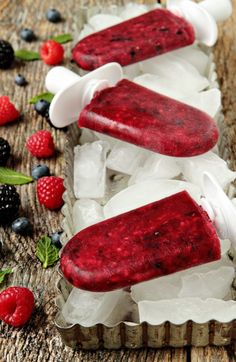
Combine all ingredients in a blender. Pulse the machine until the mixture begins to smooth, but still has a little texture to it.
ASSEMBLE THE POPS
Remove Zoku Quick Pop Maker from the freezer. Insert sticks and pour the Berry Mojito base into each cavity until you reach the fill line. Let freeze completely and remove the pops with the Super Tool. Repeat with remaining pops.
*The amount of simple syrup you use will vary depending on the sweetness of the berries.
- 1 cup heavy cream, divided
- 2/3 cup water
- 2 Tbs. instant espresso powder
- 1/4 cup granulated sweetener like Swerve Sweetener
In a saucepan over low heat, combine and heat 2/3 cup heavy cream and water (but do not boil). Whisk in espresso powder and sweetener until dissolved. Remove from stovetop and let cool slightly, about 10 minutes. Stir in 1/3 cup heavy cream. Refrigerate until cool, stirring occasionally to prevent a skin from forming.
To assemble the pops, remove Zoku Quick Pop Maker from freezer. Insert sticks into the pop maker molds and pour in the cooled coffee base until you reach the fill line. Let freeze completely; then, remove the popsicles with the Super Tool and enjoy. Repeat to make the remaining pops. Makes 6 pops.
Healthy Slushes and Milkshakes - yum!
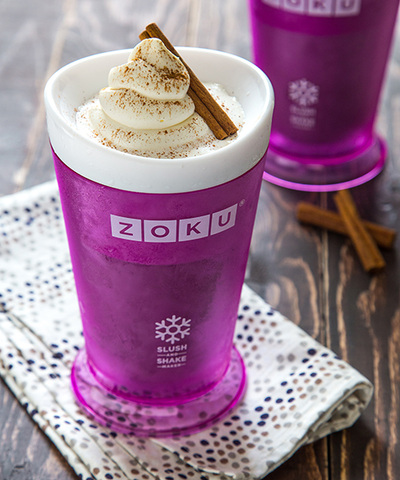
For my Zoku Holiday Pops Party, I made two different slush recipes for my guests: Peppermint Latte Slush and Oregon Chai Slush.
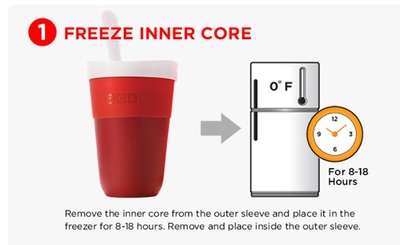
The Oregon Chai Slush is so simple that it really doesn't require a recipe: follow the directions on the box of Oregon Chai Concentrate (with sugar/honey or sugar-free version) to make chai. When chai mixture is cooled, pour 1-1/4 cups of chai mixture into frozen inner core of Zoku Slush & Shake Maker.
- 1/2 cup cream
- 3/4 cup water
- 1/4 cup powdered sweetener of your choice (Swerve Sweetener or Truvia)
- 2 to 4 shots freshly brewed espresso or espresso powder dissolved in water (see directions on container of espresso powder)
- 1/4 to 1/2 tsp. peppermint extract, or to taste
Whisk the cream, water, powdered sweetener, espresso, and peppermint extract until the sweetener dissolves, about 2 minutes. Remove Slush & Shake Maker core from freezer and place in frozen cup in holder. Pour Peppermint Latte Slush mix into Slush & Shake Maker; stir until thick.
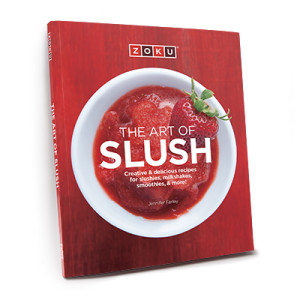
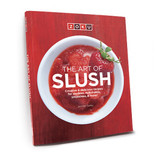
| For additional slush, shake, and smoothie recipes, consider purchasing Zoku's "The Art of Slush" recipe book! |
| A few years ago, my daughters and I watched an online video of the Zoku Quick Pop Maker . . . . . . and we were enthralled! How much fun could it be to make our own healthy (or sometimes not-so-healthy) popsicles at home on the spur of the moment? Like in 7 to 10 minutes? And even if the sweeter, "unhealthy" pops weren't something we made all the time, we could control the ingredients, using honey, agave, or other natural sweeteners in our frozen treats. Yum! |
I'm thrilled to be hosting a Zoku Holiday Pops Party in my home this coming weekend, thanks to Tryazon. I'll be demonstrating how to use a variety of Zoku frozen treat dessert products for Christmas treats and for year-round frozen dessert treats. And of course, there will be lots of laughter, Christmas music, snacks, and possibly a few surprises for the guests!
Want to know why I've agreed to review Zoku's frozen dessert makers for you all?
The main reason is that I think you should all know how easy it can be to make healthier, homemade frozen treats for your family, containing natural, health-promoting ingredients, without:
- food coloring/artificial colors
- artificial flavors
- "natural" flavors (which are usually not natural at all)
- chemical whitening agents like titanium dioxide
- artificial sweeteners
- loads of sugar
Now, keep in mind that some of the recipes and options I'm going to make will contain sugar, but at least I can control the amount of sugar and calories in these frozen desserts.
The second reason I agreed to demonstrate and review these Zoku products is that Zoku has come up with some pretty nifty tools since the original Zoku Quick Pop Maker became available in 2009! I thought it would be fun to give these a try and let you know how well they work (or don't work).
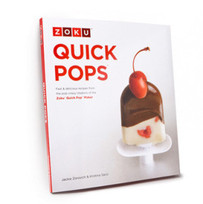
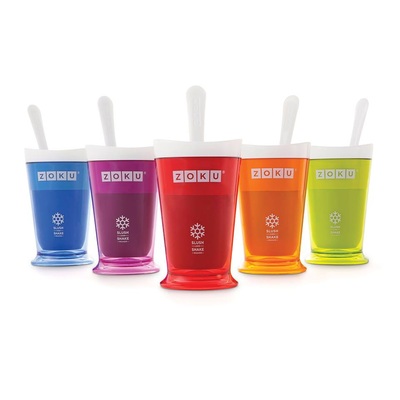
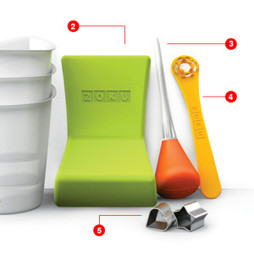
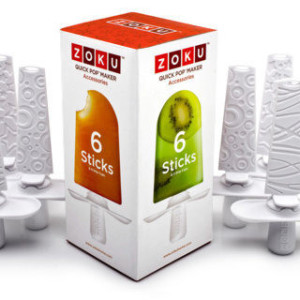
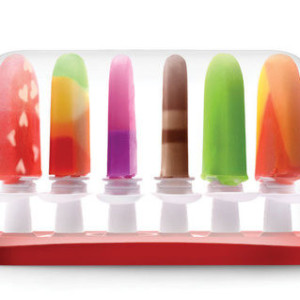
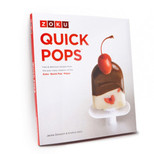
Here are the Zoku products I'll be demonstrating for my guests:
If you're looking for a unique gift for your children or grandchildren - or the children on your block of the neighborhood, the Zoku Quick Pops Maker or Slush & Shake Maker are going to be a hit with them all. ☺
And my daughters are a testimony to that. Their friends love the popsicles and treats made with their Zoku Quick Pops Maker!
I'll send out an update with photos of our party and how these products worked for making quick, fun desserts for Christmas. I think you'll be pleasantly surprised at what amazing, fun dessert treats can be made with Zoku products. We were!
Hi! I'm Julieanne!
You'll find me in the kitchen
trying new Trim Healthy Mama recipes, loving God, and carrying out that love as I bless my husband and teen daughters.
Find
Joy In Our Journey on:
Joy In Our Journey's
latest blog posts, freebies, and more!

Search
Joy In Our Journey
Archives
December 2016
August 2015
July 2015
March 2015
February 2015
January 2015
December 2014
November 2014
October 2014
September 2014
August 2014
July 2014
June 2014
May 2014
April 2014
March 2014
February 2014
January 2014
December 2013
November 2013
October 2013
September 2013
August 2013
July 2013
June 2013
May 2013
April 2013
March 2013
February 2013
January 2013
December 2012
November 2012
October 2012
September 2012
August 2012
July 2012
June 2012
May 2012
April 2012
March 2012
February 2012
January 2012
December 2011
November 2011
October 2011
September 2011
August 2011
July 2011
June 2011
May 2011
April 2011
March 2011
February 2011
January 2011
December 2010
November 2010
October 2010
September 2010
August 2010
July 2010
June 2010
May 2010


